Why You’ll Love It
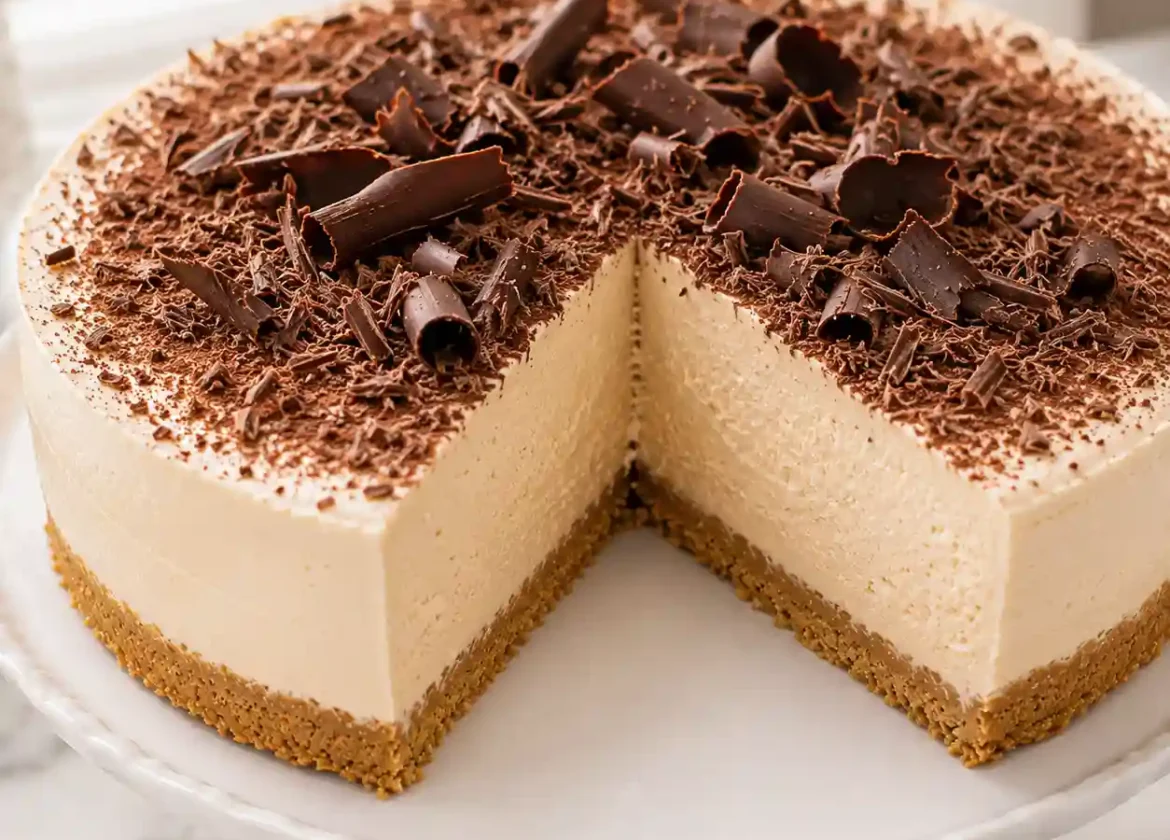
I’ve made this no-bake Mary Berry Baileys Cheesecake Recipe countless times, and honestly, the magic is in how effortless it truly is. There’s no oven required, no faff with complicated techniques, and the result? Pure indulgence that tastes like it took hours. The Baileys kick combined with that rich, creamy texture is genuinely moreish—I guarantee your guests will be reaching for seconds and thirds before you’ve even finished serving. What makes this recipe a crowd-pleaser is that it works for parties, birthdays, just because gatherings, and it’s fancy enough to impress without the stress. The velvety combination of chocolatey warmth and the smooth Irish cream liqueur creates something that sits somewhere between a light, buttery dream and proper indulgence, all done while you relax with whipped cream and chocolate ready to top it off straight from the tin.
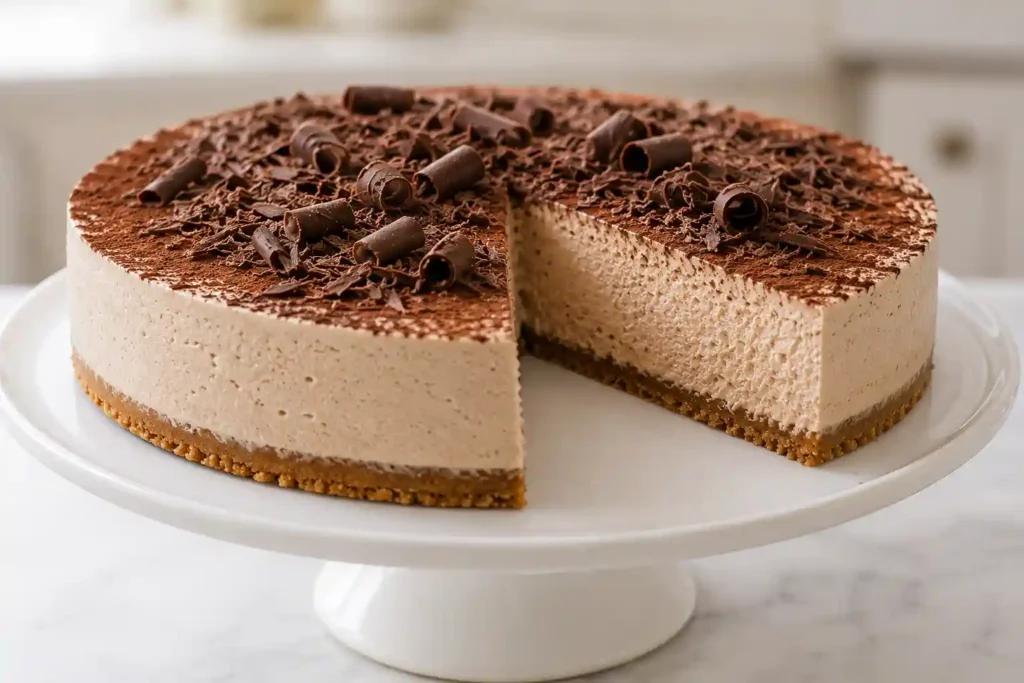
Once you chill this in the fridge, the silky layers set into something truly special—firm enough to slice neatly yet soft enough that it melts on your tongue. I personally love making this the day before a celebration because it’s a genuine make-ahead dessert that one less thing to stress about. The golden biscuit base stays crisp, the filling stays pillowy and airy, and you’ve got time to prep everything else. This is the kind of dependable recipe that delivers impressive results every single time.
Ingredients
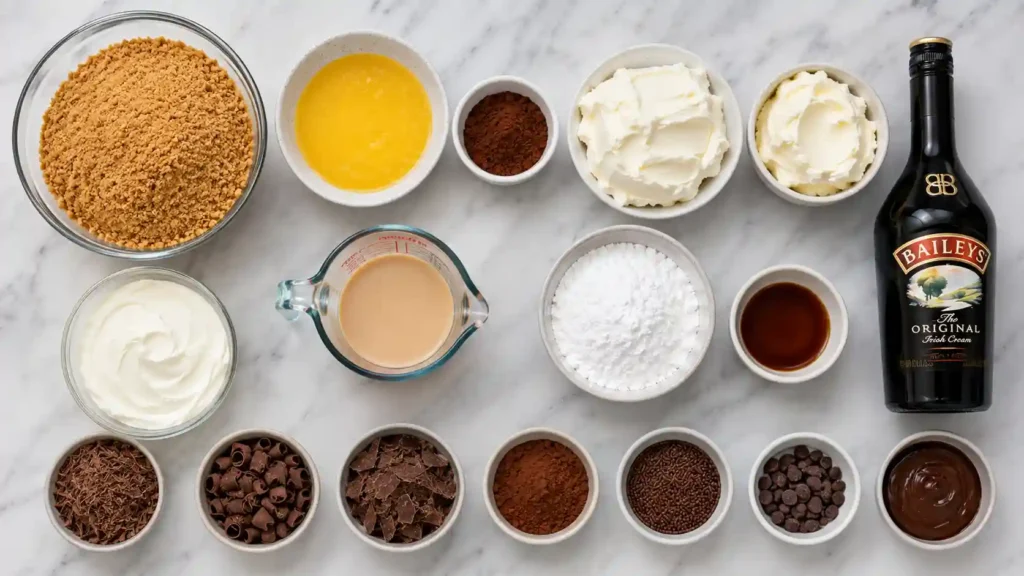
| Ingredient | Quantity | Purpose / Notes |
| Digestive biscuits (crushed) | 200g | Creates the crisp, buttery biscuit base. Crush into fine crumbs using a food processor or rolling pin. |
| Unsalted butter (melted) | 100g | Binds the biscuit crumbs together to form a firm cheesecake base. |
| Cocoa powder | 1 tbsp (optional) | Mixed into the base for a richer chocolate flavour. |
| Full-fat cream cheese (softened) | 500g | Provides a smooth, rich, and creamy cheesecake filling. Softened cream cheese helps achieve a lump-free texture. |
| Mascarpone | 250g | Adds extra creaminess and a luxurious, velvety texture. |
| Double cream | 125ml | Lightens the filling and helps create a soft, airy consistency. |
| Baileys Irish Cream or Baileys Original Irish Cream | 200ml | Gives the cheesecake its signature creamy Irish cream flavour. Adjust slightly to suit your taste. |
| Icing sugar (sifted) | 100g | Sweetens the filling while keeping it smooth and silky. |
| Vanilla extract | 1 tsp | Enhances the overall flavour and balances the sweetness. |
| Dark chocolate | To taste | Grated or shaved over the cheesecake for decoration. |
| Chocolate curls | To taste (optional) | Decorative topping that adds texture and an elegant finish. |
| Shaved chocolate | To taste (optional) | Alternative garnish for extra chocolate flavour. |
| Cocoa powder | For dusting (optional) | Lightly dust over the cheesecake before serving. |
| Melted chocolate | Optional | Drizzle over the top for a richer finish. |
| Chocolate flakes | Optional | Adds extra crunch and decoration. |
| Sprinkles | Optional | Fun decorative topping, especially for celebrations. |
How to Make It
Start by lining a 20cm springform tin with baking paper and crushing your digestive biscuits into fine crumbs—they should resemble damp sand when mixed with your melted butter and cocoa powder. Press this mixture firmly into the base using the back of a spoon, creating a smooth surface, then slide it into the fridge to chill for about 20 minutes while it firms up. This step is crucial because a solid base prevents the dreaded base falling apart later when you’re trying to slice neatly.
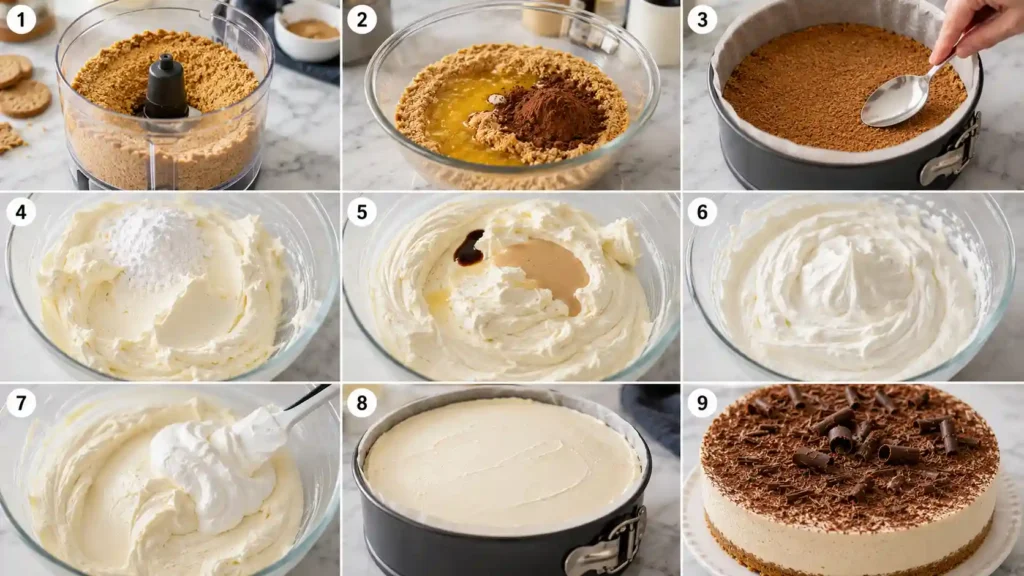
In a large bowl, beat your softened cream cheese and mascarpone together until you have something completely smooth and lump-free—take your time here. Gently fold in your icing sugar, then the Baileys and vanilla extract. In a separate bowl, whisk your double cream to soft peaks (crucial: don’t overwhip or it becomes dense filling), then fold this into the cheesecake mixture until evenly combined and the whole thing holds its shape with that pillowy, light, airy quality. Spoon this filling onto your chilled biscuit base using a spatula, smoothing the level surface as you go. Cover and refrigerate for at least 4 hours, though overnight chilling gives you the best texture and ensures it’s fully set and fully firm.
When it’s time to serve, keep a sharp knife nearby and dip it in hot water, wiping it clean between cuts for those tidy cuts and smooth portions every time. Top with your grated chocolate, drizzle of melted chocolate, or chocolate curls and dig in.
Recipe Tips for the Best Results
The difference between a firm cheesecake filling and one that’s frustratingly soft comes down to two things: using full-fat cream cheese (not light versions) and proper overnight chilling. I can’t stress this enough—if you skip the chilling step or don’t give it at least 4 hours, your slices won’t hold their shape and you’ll end up with a lovely but messy puddle on the plate. Don’t be tempted to add more Baileys thinking it improves flavour—too much alcohol actually stops the filling from setting properly, and you want to balance sweetness carefully by tasting your mixture before the whipped cream goes in.
One mistake I see people make is overwhip cream or overmix the filling, which creates that dense, heavy texture nobody enjoys. Soft peaks is the magic point—your cream should still look slightly fluffy and fold easily into the base mixture without deflating completely. The biscuit base also needs respect: press biscuits firmly into that tin, make sure it’s cold and solid, and chill base properly so it stays crisp throughout. If you want extra richer flavour, swap regular digestives for chocolate biscuits or add extra cocoa to the base. Finally, use a sharp knife with hot water wipes between each cut—this one trick transforms your smooth portions from rustic to restaurant-quality, making the whole thing look as professional as it tastes.
Serving Suggestions
When it comes to plating this beauty, serve chilled straight from the fridge for the best experience—or better yet, well chilled if you’ve got the time. I always reach for a warm knife to hold shape better when cutting, and honestly, the presentation possibilities are endless. A luxurious finish comes from adding extra whipped cream on the side, a generous drizzle of chocolate sauce, and a scatter of chocolate curls, chocolate shavings, or grated chocolate with a light dusting of cocoa powder. For those who love berries, fresh raspberries and strawberries add a tartness that cuts through the richness beautifully.
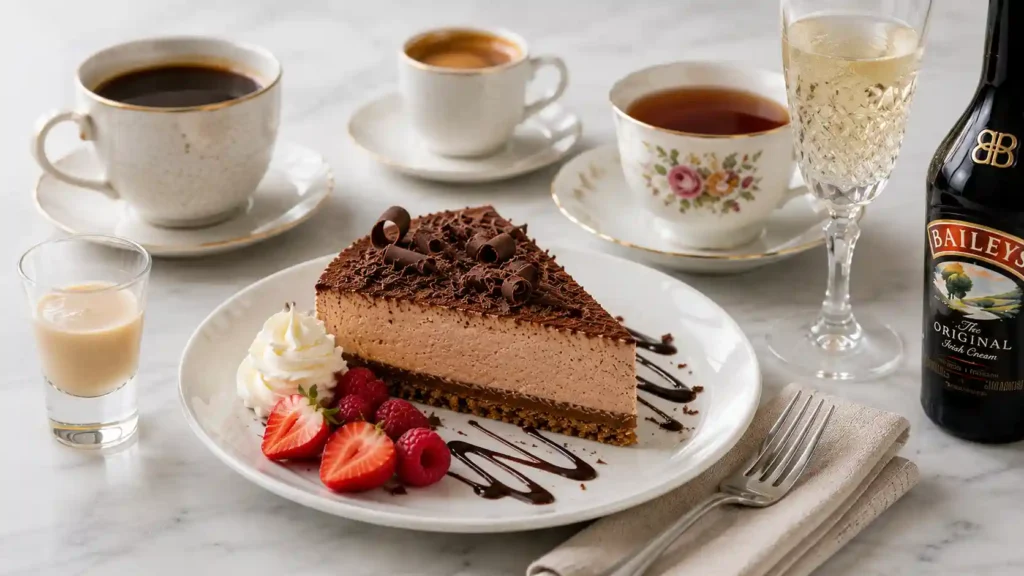
I genuinely believe this works as the star of any dessert table at celebrations, or as the finale to a meal, and pairing suggestions depend on what you’re after—freshly brewed coffee, espresso, strong coffee, or even strong tea all complement it perfectly. If you’re leaning into the indulgence, a small glass of Baileys on the side is extra indulgence at its finest, though Earl Grey tea or sparkling elderflower cordial offer lighter, more elegant accompaniments for those wanting balance over decadence. Fresh berries scattered on top make it look restaurant-ready without any fuss.
Healthy Alternatives & Variations
Not everyone wants the full-fat version, and that’s completely fair—you can create a lighter version by using reduced-fat cream cheese and even replace half the standard cream with Greek yoghurt for a tangier filling that’s actually quite nice. If chocolate is your thing, swap your regular digestives for chocolate digestive biscuits to build a richer base, or play with the base entirely by choosing to leave out cocoa powder if you want a paler cheesecake with a more delicate look.
Another variation I’ve enjoyed involves creating a subtle chocolate layer by spreading melted dark chocolate across the biscuit base before adding the main filling—it adds sophistication without overwhelming the palate. These tweaks don’t require any special technique; they’re simply ingredient swaps that let you customize based on what you’ve got at home or what suits your dietary preferences. The beauty of this recipe is its flexibility: it adapts brilliantly to different preferences without losing its essential character.
Storage & Keeping It Fresh
This no-bake cheesecake is brilliant because it keeps beautifully, and here’s what I do: at room temperature, it’ll be fine for about 1 hour (useful during service), but because it’s made with fresh dairy, always return it to the fridge or refrigerator as soon as guests finish eating. Store covered in an airtight container or tightly wrapped in cling film or foil to prevent it from absorbing flavours from other foods. It keeps 3–4 days easily, though I’d honestly use it up to 3 days for the creamy filling at its absolute peak—beyond that and it starts to deteriorate slightly.
For longer storage, freeze individual slices (much better than freezing whole) by wrapping each well in cling film; they’ll keep up to 2 months or even up to 3 months in the freezer. When you want to eat them, defrost or thaw them overnight in the fridge rather than at room temperature—this prevents condensation that can make the base soggy. The golden rule: no reheating is needed or wanted; serve cold straight from the fridge for the best result every single time.
Nutrition Facts (Per Serving, Approx.)
Each slice contains roughly 389 to 520 kcal depending on portion size and exact ingredients used, so nutrition values can vary quite a bit. Breaking it down: you’re looking at around 28–34g carbohydrates (or carbs), approximately 5–6g protein, and 30–40g fat with 19g saturated fat lurking in there—it’s low-ish in protein but honest about being an indulgent dessert. Sugar typically sits at 20–30g per slice, and sodium around 230mg, which is reasonable. These are just estimates, mind you, as ingredients used and portion sizes shift these numbers around considerably. If you opt for the healthier variations using reduced-fat cream cheese or Greek yoghurt, you’ll naturally lower the fat and calorie content. The nutritional reality is that this is a treat, not an everyday pudding, so I never stress about the numbers—I just enjoy every spoonful.
Frequently Asked Questions
Can I make this Baileys cheesecake ahead of time?
Yes. This cheesecake is ideal for making ahead. Prepare it the day before or even the night before serving to give it plenty of time to set properly. Chilling overnight helps the biscuit base stay firm, allows the creamy filling to develop a better texture, and enhances the overall flavour while reducing last-minute preparation.
What can I use instead of real Baileys?
If you don’t have Baileys Irish Cream, you have several alternatives. You can use Baileys flavour syrup, Baileys-style syrup, or another cream liqueur such as Kahlua, Irish whiskey cream, or even an espresso shot for a coffee-flavoured twist. If using a thinner liquid, reduce the quantity slightly to help the cheesecake set properly. For an alcohol-free version, choose a non-alcoholic Baileys-style syrup.
Can I use different biscuits for the base?
Absolutely. While digestive biscuits create the classic buttery base, you can also use chocolate digestive biscuits, chocolate hobnobs, graham crackers, or Oreos for a delicious variation with a different flavour and texture.
Do I need a springform tin?
A springform tin is highly recommended because it makes removing the cheesecake much easier. Once the cheesecake has fully set, simply release the sides of the tin for clean edges and an attractive presentation.
Can I make a vegan version?
Yes. To make this cheesecake vegan, replace the traditional ingredients with plant-based cream cheese, plant-based cream, plant-based butter, and a vegan-friendly Baileys alternative. The cocoa powder is optional but adds extra colour and flavour if desired.
Try More Recipes
Mary berry chocolate chip banana bread recipe
Mary Berry Marmalade Loaf Cake Recipe
Mary Berry Ginger And White Chocolate Cheesecake Recipe
Mary Berry Chocolate Orange Cheesecake Recipe
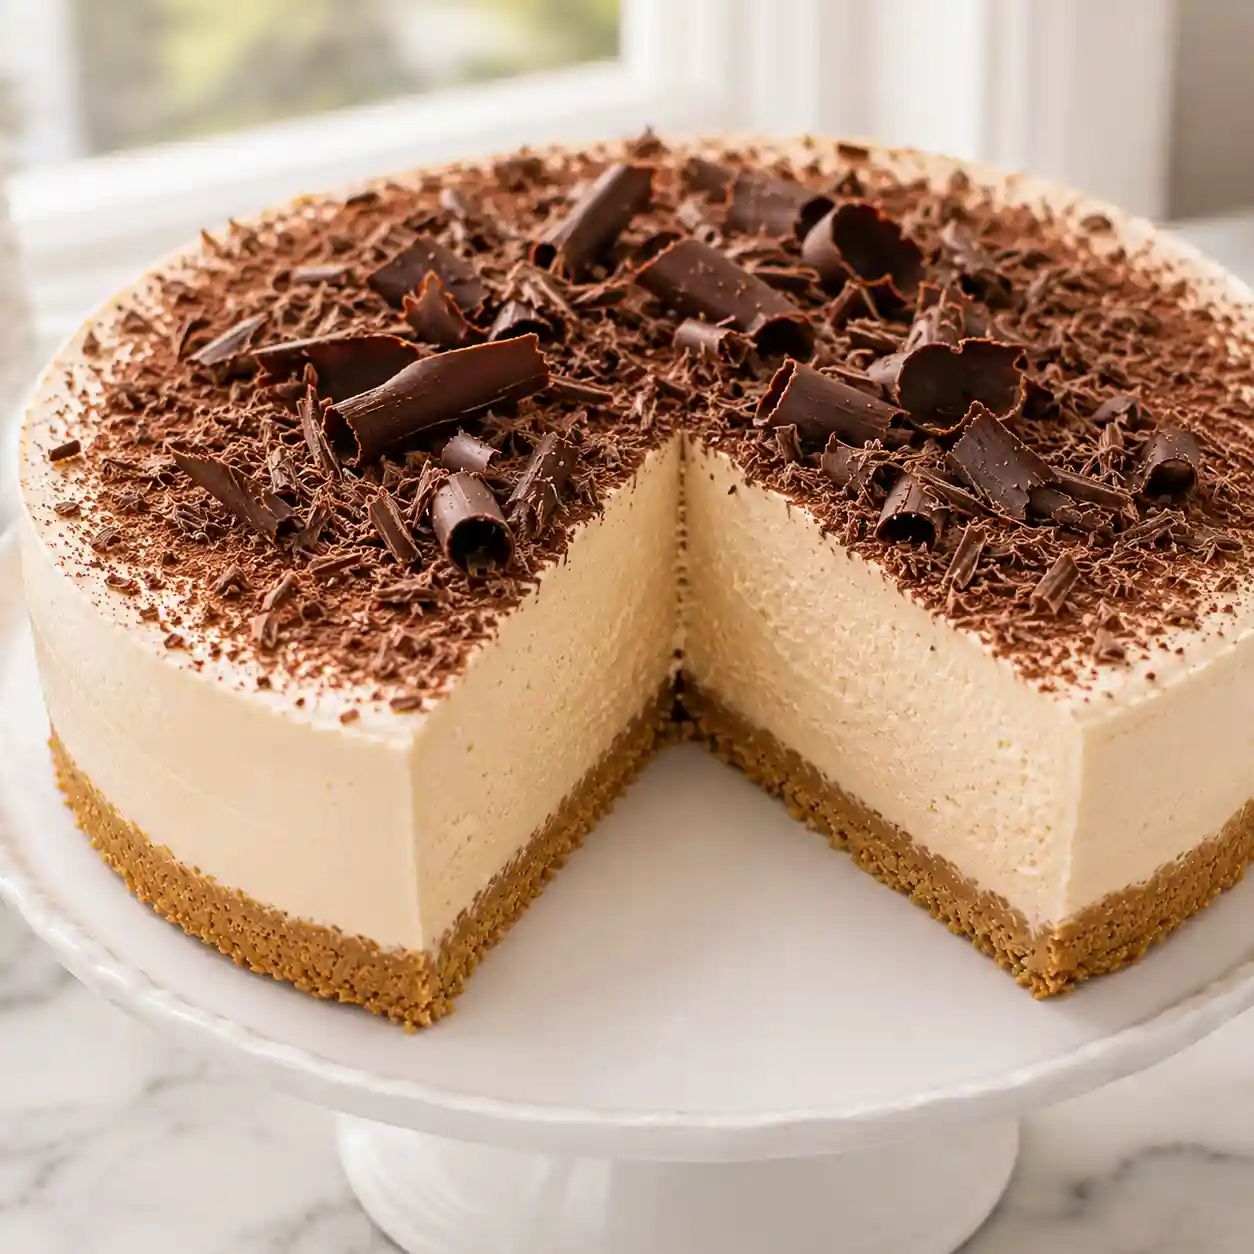

Mary Berry Baileys Cheesecake Recipe
Ingredients
Equipment
Method
- Line a 20cm springform tin with baking paper.
- Mix the crushed digestive biscuits, cocoa powder, and melted butter until evenly combined.
- Press firmly into the base of the tin and refrigerate for 20 minutes.
- Beat the softened cream cheese and mascarpone until completely smooth.
- Mix in the sifted icing sugar, Baileys Irish Cream, and vanilla extract.
- Whisk the double cream to soft peaks, then gently fold it into the cheesecake mixture.
- Spoon the filling over the chilled biscuit base and smooth the surface with a spatula.
- Cover and refrigerate for at least 6 hours, preferably overnight.
- Decorate with grated dark chocolate, chocolate curls, shaved chocolate, cocoa powder, or melted chocolate before serving.
Notes
- Chill overnight for the firmest texture and clean slices.
- Always use full-fat cream cheese and mascarpone for the creamiest filling.
- Do not overwhip the double cream.
- A springform tin makes removing the cheesecake much easier.
- Dip a sharp knife in hot water and wipe clean between slices for neat presentation.