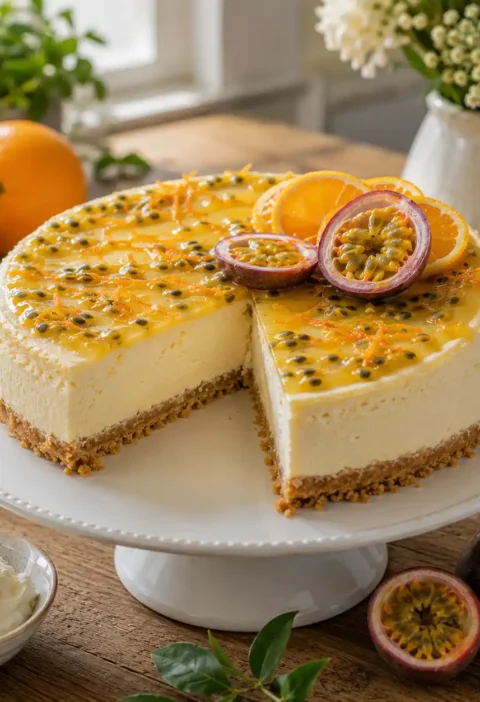
Why This Recipe Stands Out
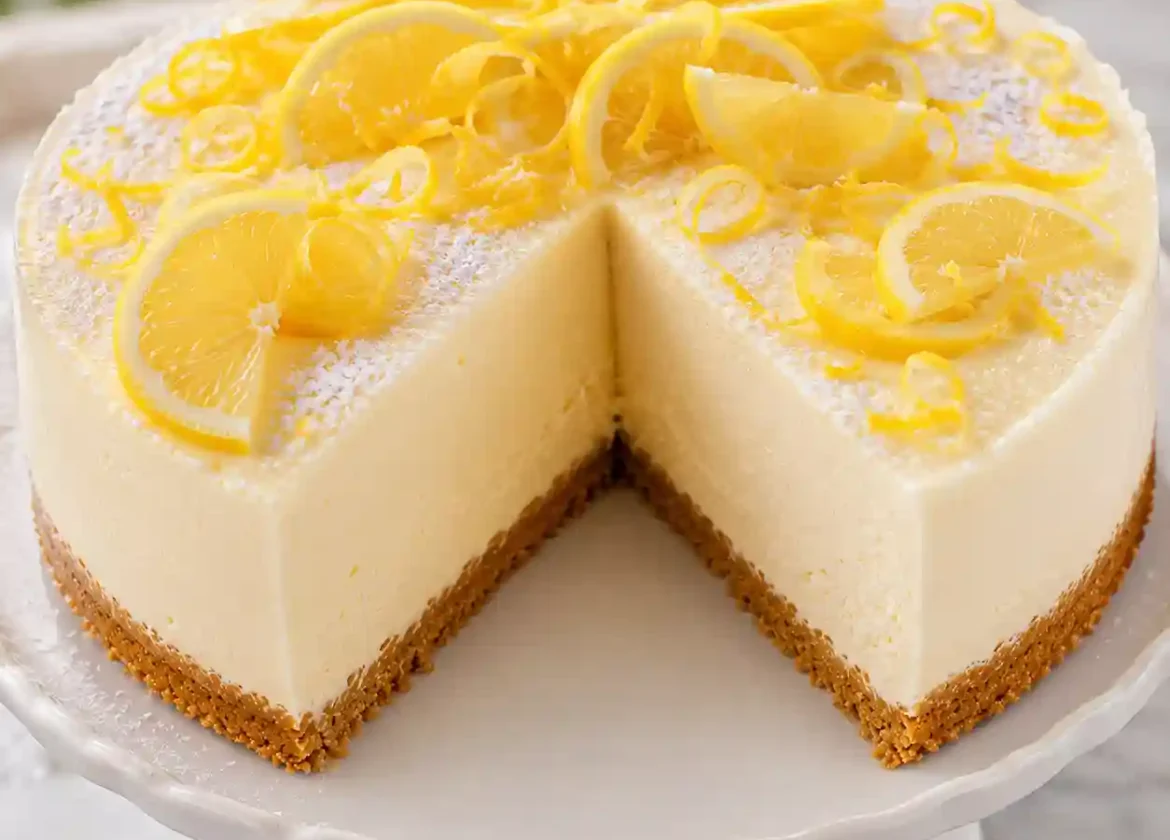
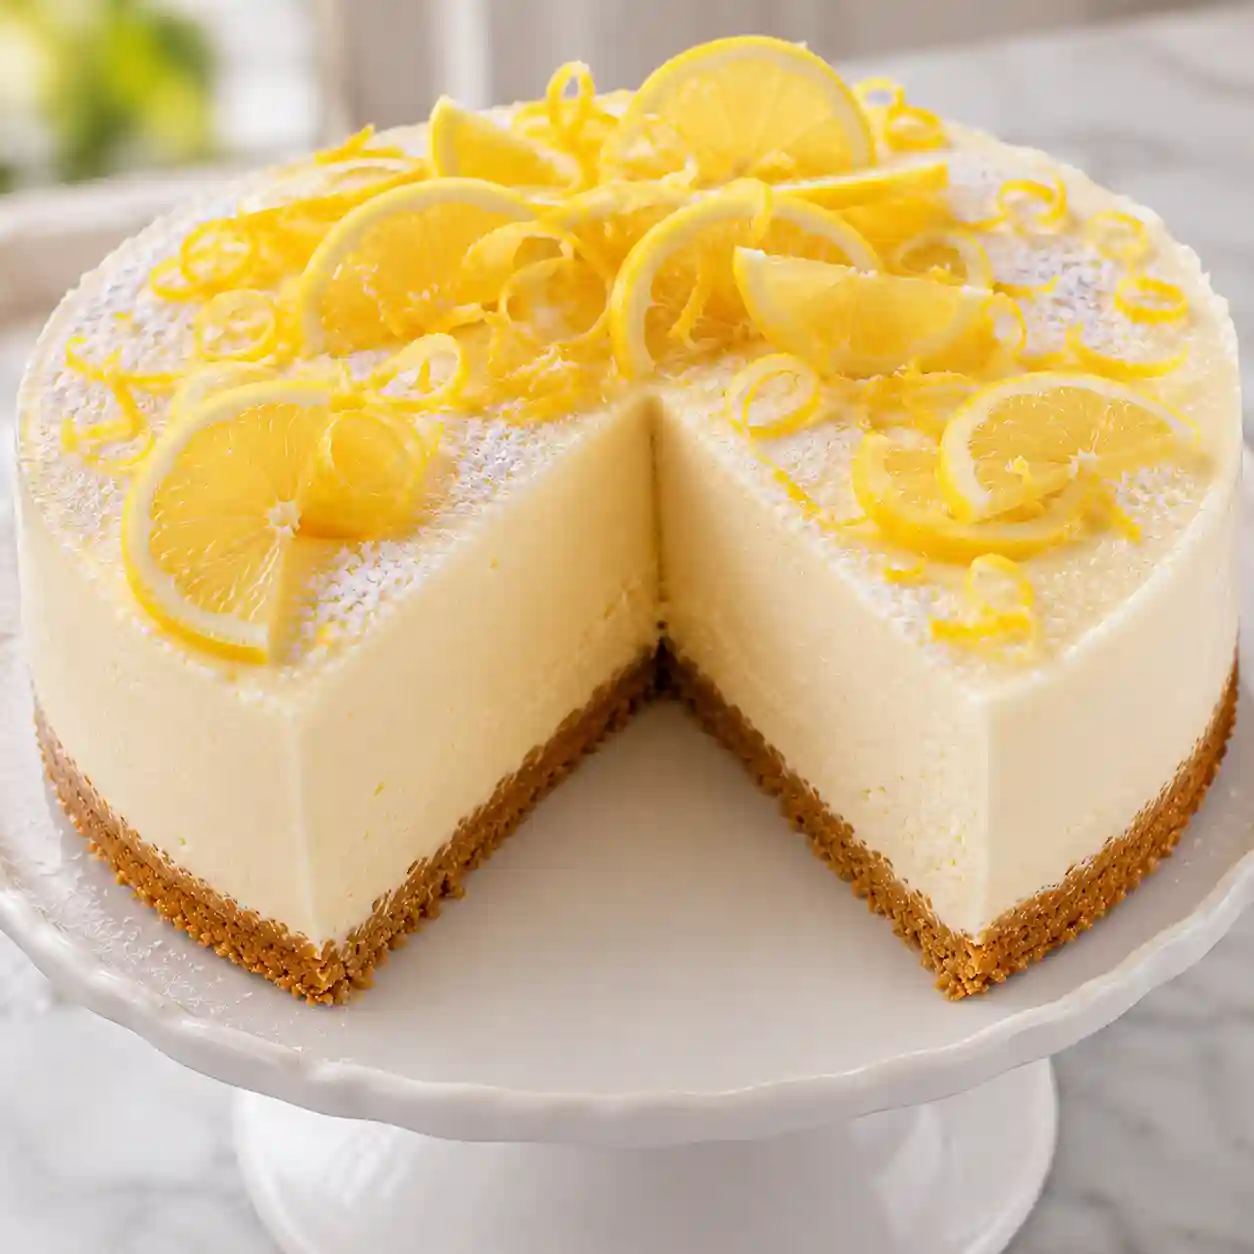
When I first tried Mary Berry Lemon Cheesecake Recipe, I understood why Mary Berry is known as a true baking legend. Whether you follow Mary Berry’s Lemon and Lime Cheesecake Recipe, enjoy a classic Mary Berry lemon cheesecake, prefer an American lemon cheesecake, or love a No Bake Lemon Cheesecake (Mary Berry), each version delivers a wonderfully creamy, smooth, and light texture with a rich finish. The combination of a crisp biscuit base, buttery biscuit base, biscuity base, and buttery base creates the perfect contrast to the creamy filling, light filling, lemony filling, and lemony topping. Every bite is packed with citrus flavour, bright citrus flavour, a delicately tangy taste, plenty of fresh lemon, lemon, lime, zest, and zing, making this cheesecake an easy dessert, chilled dessert, and easy recipe that many people also call the easiest recipe and tastiest recipe.
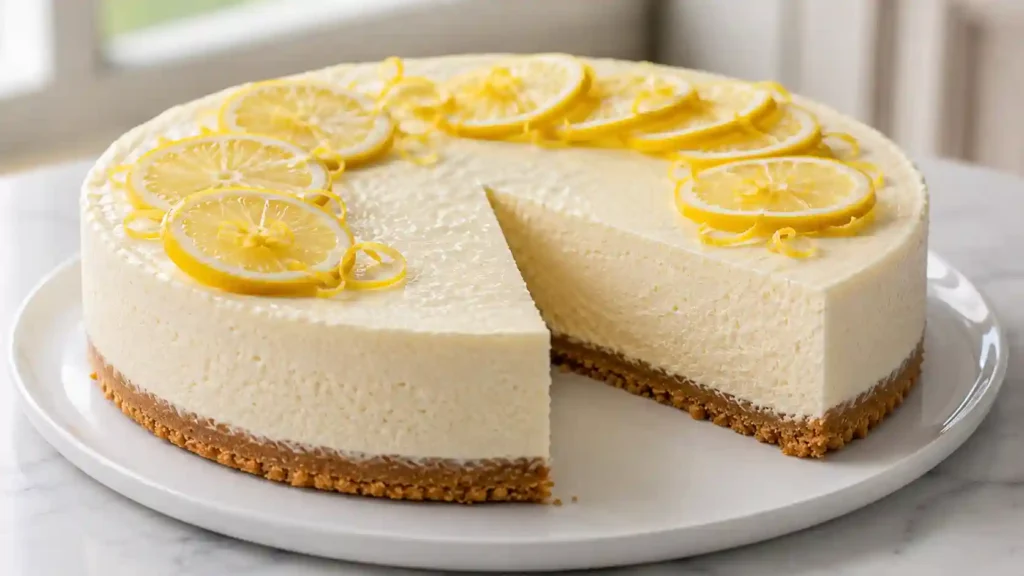
I often prepare this dessert as a make ahead treat because it can be made the day ahead, chilled overnight, and left to set for the perfect set before serving on a serving plate or even a red serving plate for special occasions. It looks elegant enough for entertaining, dinner parties, or as a birthday cake alternative, yet it is equally perfect for a relaxed weekend bake, a cosy family meal, or a simple pudding shared with guests. It also fits beautifully into family baking, where kids, toddlers, and young children can join in, just as many parents, including every Mum following Cooking With My Kids, enjoy doing. Inspired by Mary Berry’s Cookery Course and the classic Cookery Course first published in 2013, this recipe has the same timeless appeal as her famous lemon drizzle cake, making it a favourite that I return to again and again.
Ingredients You’ll Need
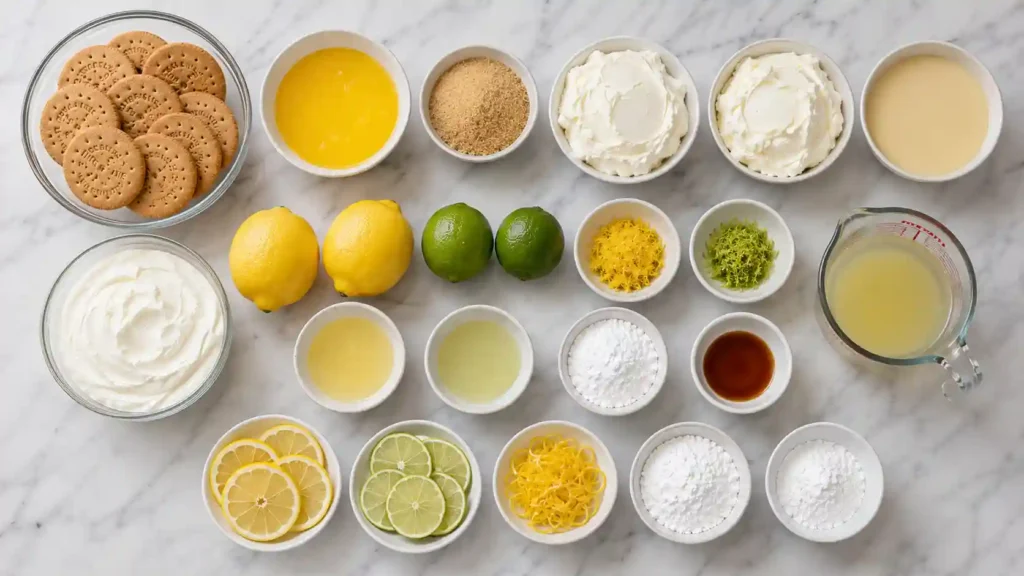
| Ingredient | Quantity | Purpose / Notes |
| Digestive biscuits | 10 biscuits (about 200g) | Crush into fine crumbs to create the crisp biscuit base. Use a food processor or rolling pin with a plastic bag. |
| Unsalted butter (melted) | 75g | Mixes with the biscuit crumbs to bind the base together. |
| Demerara sugar | 40g | Adds sweetness and a slight crunch to the biscuit base. |
| Full-fat cream cheese (room temperature) | 400g | Forms the rich, smooth, and creamy cheesecake filling. Room temperature cream cheese helps prevent lumps. |
| Full-fat soft cheese | 225g | Adds extra creaminess and a lighter texture to the filling. |
| Full-fat condensed milk | 397g | Sweetens the cheesecake while giving it a silky, smooth consistency. |
| Double cream | 300ml | Creates a rich, light, and airy filling. |
| Lemons | 2 large | Use both the zest and juice for a fresh, bright citrus flavour. |
| Limes | 1½ | Use both the zest and juice to add a delicate tangy flavour. |
| Icing sugar | 100g | Sweetens the filling while keeping the texture smooth. |
| Vanilla extract | To taste (about 1 tsp) | Enhances the citrus flavours and balances the sweetness. |
| Lemon slices | Optional | Fresh garnish for serving and decoration. |
| Lime slices | Optional | Adds colour and a fresh citrus finish. |
| Lemon or lime zest curls | Optional | Elegant decorative topping with extra citrus aroma. |
| Extra grated zest | Optional | Sprinkle over the cheesecake for additional flavour and presentation. |
| Ingredient | Substitute | Notes |
| Cream cheese | Greek yoghurt (partial replacement) | Creates a lighter cheesecake with a slightly tangier flavour. |
| Double cream | Whipping cream | A suitable alternative that still produces a light and creamy filling. |
| Fresh lemon juice | Bottled lemon juice | Fresh juice is recommended for the brightest flavour, but bottled juice can be used if necessary. |
How to Make Your Lemon Cheesecake
Prepare base by crushing your digestive biscuits into biscuit crumbs using whichever method suits you—I personally use the food processor because it’s faster and gets them to perfect fine crumbs consistency. Mix these with your melted butter and demerara sugar until it feels like damp sand, then press firmly into your 20cm loose-bottomed tart tin using the back of a metal spoon to create an even layer and smooth surface. Slide this into the fridge and chill 30 minutes to let it set properly—this step prevents your base from falling apart later. While that’s chilling, make filling by beating your cream cheese and soft cheese together in a mixing bowl until you have something lump-free and smooth. Add your condensed milk, icing sugar, lemon zest, lemon juice, and vanilla extract, stirring gently. In a separate bowl, whip your double cream to soft peaks using a balloon whisk, then fold gently this fluffy cloud into your filling until evenly combined and light and airy.
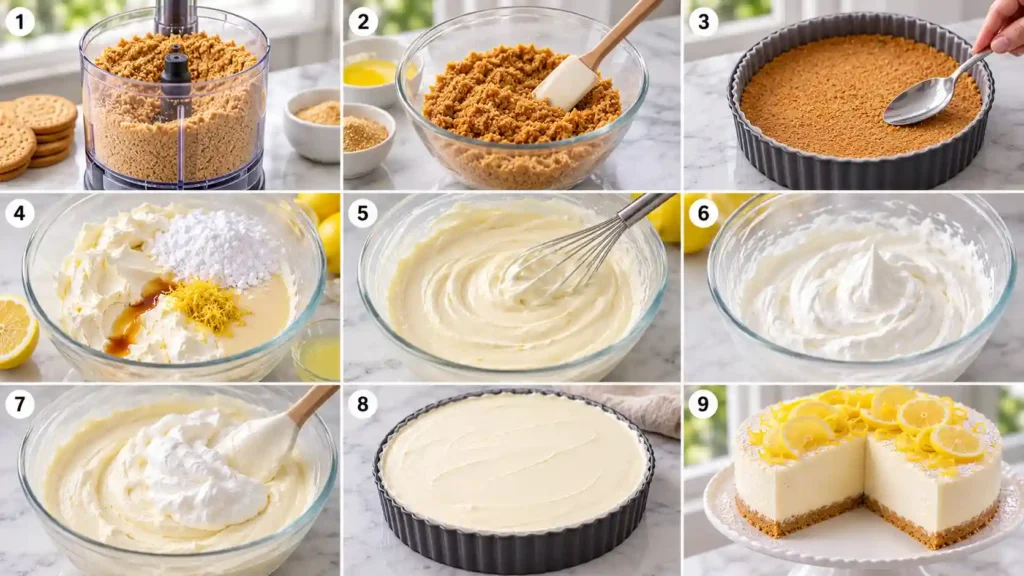
Spoon filling onto your chilled biscuit base using a spatula, spreading it level across the top, then cover and refrigerate overnight (or at least 4 hours minimum if you’re in a hurry). The longer it sits, the better it sets and the more the lemon flavour develops—I genuinely think at least 6 hours is ideal for a perfect set that’s firm throughout. To serve, run a knife around the edge and loosen cheesecake gently before releasing from the tin onto your serving plate. The whole thing becomes beautifully firm yet still maintains that creamy texture that makes this chilled dessert so irresistible.
Top Tips for Getting It Right
Here’s where my decades of baking experience comes into play: the secret to firm cheesecake that slices neatly every time is respecting the chill time—don’t rush it. Overnight chilling genuinely gives you the best texture, and if you can manage at least 6 hours instead of just four, you’ll notice the difference. For clean slices, dip a knife in hot water and wipe it between each cut; this clever tips makes plating look professional and prevents cracks. If you want a stronger lemon flavour, add extra lemon zest and maybe a touch more lemon juice, but go carefully because you don’t want it becoming mouth-puckeringly sour. The citrus aroma should be inviting, not overpowering. Don’t overbeat your cream filling, and definitely don’t overwhip your cream—soft peaks is genuinely the magic point where everything folds gently together without becoming dense or deflating your beautiful airy creation.
I’ve made this recipe dozens of times with different tweaks, and the consistency comes from understanding that a compact base comes from pressing firmly using the back of a spoon or even the base of a glass for even pressure. Chill thoroughly at every stage—it’s not wasted time, it’s building the foundation for success. Thick filling texture depends on proper cream whipping and gentle folding; if your cheesecake too soft when you come to serve it, you likely either skipped the chilling or the cream was overwhipped. This is an easier recipe than most cheesecakes precisely because there’s no baking involved, which means you can’t overcook anything—just give it time and trust the process.
How Kids (and Toddlers!) Can Get Involved
This is genuinely one of my favourite family baking projects because there’s no heat involved, making it safe for young children and even toddlers to participate properly. Let the kids help with the fun bits: they love to bash biscuits in a sealed bag using a rolling pin until they become fine crumbs—it’s messy, it’s fun, and they feel properly involved. They can help mix together the crumb mixture in a bowl, though you’ll want to take over the pressing into the tin for precision.
If you’ve got a lemon juicer, let them squeeze lemon juice while you guide them—it’s a brilliant simple job that teaches them about cooking without any risk. Young children can whisk (supervised), add ingredients to the bowl, and taste-test the filling before it’s chilled (just remember it contains raw egg-free cream cheese, so it’s safe). Mum (or parent) handles anything sharp or requiring precision, but this really is a recipe where kids genuinely feel like they’re making something impressive rather than just watching. It’s brilliant for building confidence and creating those family memories around food that last.
Can You Use Mascarpone Instead of Cream Cheese?
Absolutely, and in fact, mascarpone creates an interesting alternative to cream cheese in cheesecakes. Mascarpone is technically a white cheese and soft cheese like cream cheese, but it has a mild taste compared to the tangy flavour of regular cream cheese—this means your lemon flavour becomes even more prominent. The difference is that mascarpone is naturally richer and slightly less thick, so if you use it straight, you might need slightly less double cream in your cheesecake filling to achieve that perfect texture. Some bakers actually prefer a 50/50 blend of mascarpone and cream cheese because you get the best of both worlds: the mild taste of mascarpone paired with the slight tang of cream cheese, creating a beautifully balanced cheesecake. The lemon really shines through when you use this combination.
I’ve experimented with mascarpone for years, and honestly, it’s brilliant if you prefer something slightly smoother and less assertive than pure cream cheese, though traditional cheesecakes do rely on that cream cheese tang for contrast. If you go pure mascarpone, make absolutely sure it’s at room temperature because it can be temperamental when cold. The whipping stage might differ slightly—mascarpone breaks down differently than cream cheese, so fold even more gently and watch your texture closely. It’s definitely worth trying if you’re looking to switch things up, but I’d suggest testing it once before serving it at a dinner party, just to make sure you’re happy with how it turns out in your kitchen.
How Mary Berry Whips Cream
When it comes to achieving that perfect loose shape consistency for your cheesecake topping, Mary Berry is quite particular about technique—and honestly, it makes all the difference. Start with cold whipping cream in a bowl and use an electric hand mixer on the lowest setting initially, letting the cream begin thickening gradually without overworking it. As you notice the texture becoming thicker and starting to hold soft peaks, increase speed slightly, watching carefully as you continue whisking—this is where most people go wrong by getting too enthusiastic. The key is knowing when to stop: you want soft peaks that fold easily into your filling, not stiff peaks or, heaven forbid, overwhipped butter. Some bakers prefer a traditional whisk by hand in a bowl, which gives you better control, though the mixer is definitely faster. I’ve made this so many times that I can tell just by watching the cream when it’s reached that magic moment—it should look pillowy and light, ready to fold gently into the filling without deflating all your hard work.
The reason Mary Berry emphasizes this technique is because overwhipping your cream creates a dense, grainy texture that ruins the whole delicate balance of your lemon cheesecake. If you’re using an electric hand mixer, stay vigilant and don’t pop out for a cuppa halfway through—it honestly takes just a few minutes on lowest setting before you need to bump up the speed. Once you stop seeing large large pieces of liquid cream, you’re getting close. The difference between using a whisk manually versus the mixer comes down to patience and attention; the hand method gives you finer control, while the electric hand mixer is quicker if you stay focused. Either way, this particular step determines whether your cheesecake looks restaurant-quality or homemade-rustic (which is still lovely, but not quite the same).
How Mary Berry Crushes Biscuits
Mary Berry has a deceptively simple method for crushing biscuits that every home baker should know, and I’ve adopted it completely in my own kitchen. Grab a clear plastic bag, tip your digestive biscuits inside, seal it, and lay it flat on a flat surface—then take your rolling pin and bash away until you’ve got mostly fine crumbs with just a few smaller crumbs still visible. The beauty of this approach is that the clear plastic bag lets you see exactly what you’re doing; you can shake bag periodically to redistribute the larger pieces back to where the rolling pin can reach them. Some people prefer using a food processor, which works brilliantly, but Mary Berry actually recommends this low-tech method because you have better control over texture and it’s honestly quicker than getting the processor out, using it, and washing it all up afterwards. The surface you work on matters too—a sturdy table or countertop with a clean area gives you the leverage needed to crush effectively without the bag sliding about.
I genuinely think this technique is worth practicing because it’s therapeutic and surprisingly satisfying; there’s something quite meditative about bashing biscuits with a rolling pin through plastic rather than letting a machine do all the work. The clear plastic bag also means minimal mess—crumbs stay contained, and cleanup is literally just binning the bag. You’ll know when you’ve got it right: the mixture should feel like damp sand when mixed with melted butter, with no large chunks remaining. Sometimes Mary Berry suggests checking for smaller crumbs by shaking bag one final time before opening up, ensuring even texture throughout your base. This might sound like overkill, but a properly textured biscuit base really does make a difference to how your cheesecake sets and how easily it releases from the tin.
Low-Fat Cream Cheese: Will It Work?
The honest answer is: not ideally, though I understand the temptation to make swaps. Low-fat cream cheese has a different protein structure than full-fat cream cheese, which means your filling won’t set as firmly and you risk ending up with a cheesecake that’s too soft to slice neatly—this is the recipe reality that makes it worth sticking with the proper ingredient. The original recipe specifically calls for full-fat cream cheese paired with full-fat condensed milk, and this combination is crucial for achieving that smooth, creamy texture that holds its shape. If you’re determined to reduce fat, use the full-fat condensed milk as written and simply replace the full-fat cream cheese with the proper full-fat version—cutting corners on both ingredients simultaneously is where cheesecakes really struggle. Some bakers try half-fat ingredients across the board, but this usually results in a filling that either won’t set properly or becomes grainy and separated.
I’ve tested various low-fat substitutes over the years, and honestly, they don’t deliver the same results—your filling becomes thinner, less stable, and sometimes develops an unpleasant texture as it chills. If you’re watching fat intake, enjoy this lemon cheesecake occasionally as a treat rather than trying to make it “lighter” through substitutions; a smaller slice of the real thing is far more satisfying than a larger portion of a mediocre low-fat version. The full-fat cream cheese and full-fat condensed milk combination exists for a reason: it creates the chemistry needed for proper setting and texture. If you absolutely must adapt, use Greek yoghurt alongside the full-fat cream cheese rather than replacing it entirely with low-fat cream cheese—this gives you a slightly lighter result while maintaining the integrity of the recipe and your filling quality.
Serving Suggestions
There’s honestly no wrong way to serve chilled this lemon cheesecake, though I do have my favourites that make it feel special. A beautiful way is with fresh berries—particularly raspberries and strawberries—alongside a dollop of whipped cream, which brings extra indulgence. If you’re after something simpler, dust lightly with icing sugar just before serving, which creates an elegant finish without fussing.
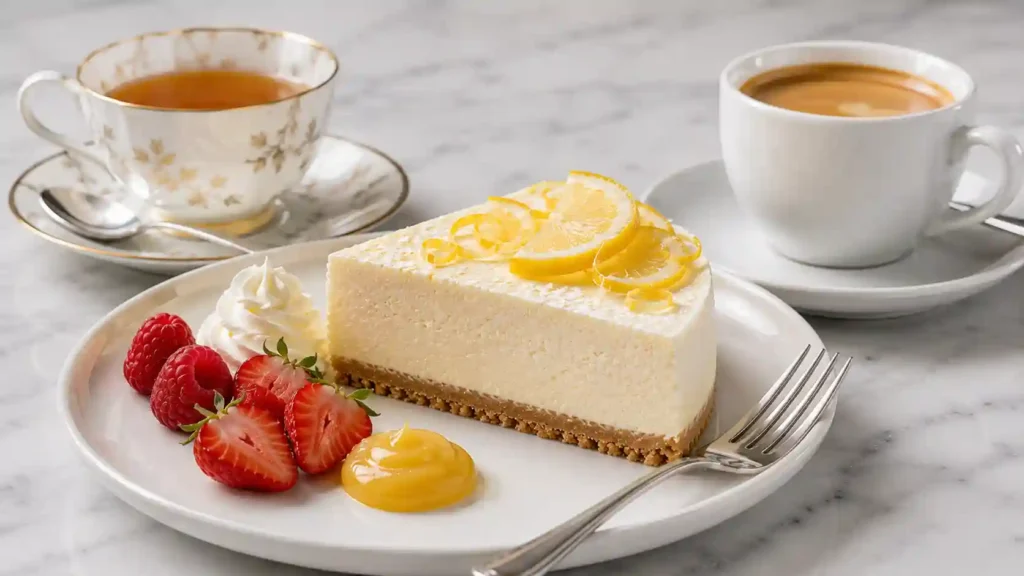
Some people absolutely love pairing it with lemon curd spooned alongside, which amplifies the citrus element beautifully, and you can always add more fruit if you’ve got it on hand. My personal favourite accompaniment is a cup of tea or fresh coffee—the slight bitterness cuts through the richness perfectly. The whole thing becomes that dreamy afternoon treat when properly served chilled from the fridge, sitting on a nice plate with a little care taken to presentation. For casual family meals, simply serve chilled with a fork and let everyone dig in; for more formal gatherings, the icing sugar dust lightly approach with fresh berries looks decidedly restaurant-quality.
Storage & Keeping It Fresh
This is where the no-bake nature of this cheesecake really works in your favour. At room temperature, it’ll happily sit for about 1 hour during serving, but because it contains a dairy filling, always return it to the fridge or refrigerator as soon as you’ve finished eating. Store covered in an airtight container or wrap tin tightly with cling film or foil to prevent it from absorbing odours and flavours from other foods in the fridge—this is crucial because dairy can absorb flavours surprisingly quickly.
Properly stored, it keeps perfectly for up to 3 days, which is genuinely few days longer than most people realise, giving you flexibility for meal planning. For longer storage, you can freeze it: the whole tin or individual slices wrapped carefully will keep up to 2 months in the freezer. When you want to eat it, remove it from the freezer and let it overnight thaw in the fridge rather than at room temperature—this prevents condensation that makes the biscuit base soggy. The dairy filling actually freezes brilliantly, and you’ll barely notice the difference when properly thawed and served cold.
Nutrition Facts (Per Serving, Approx.)
Each slice contains roughly 380 kcal to 686 calories depending on serving size and exact ingredients used, so nutrition values can vary—these are just estimates. Breaking it down nutritionally: you’re looking at approximately 28g carbohydrates, around 5g protein, and 28g fat with 16g saturated fat making up a significant portion. Sodium sits at around 210mg per slice, which is reasonable for a dairy-based dessert. These nutrition values are genuinely just estimates because portion sizes shift everything; what matters is understanding this is an indulgent treat, not an everyday pudding.
The calories come primarily from the cream, full-fat cream cheese, condensed milk, and biscuit base—if you’re calorie-counting, a smaller slice paired with fresh berries stretches it further psychologically. The protein content is modest, so this isn’t designed to be protein-dense; it’s purely about pleasure. Carbohydrates come from the biscuits and sugar, and the fat profile is typical for cheesecake based on the ingredients used—there’s no hiding the richness here, and honestly, that’s exactly the point.
Useful Equipment & Tools
Having the right baking tools makes creating this lemon cheesecake infinitely easier, and honestly, I’ve gathered quite a collection over the years. You’ll absolutely want digital scales for precision—they’re non-negotiable when working with cream cheese measurements. A mixing bowl, measuring cups, and measuring spoons are basics, but wooden spoons for gentle folding are genuinely better than metal. For the citrus element, a lemon juicer extracts juice efficiently, and a lemon zester gives you beautiful zest curls for decoration. The real workhorses in my kitchen are the freestanding mixer (though you can use a balloon whisk by hand), food processor for crushing biscuits, and a rolling pin for the backup crushing method if you prefer Mary Berry’s plastic-bag technique. Essential tins include a 20cm loose-bottomed tin for structured baking, and a measuring jug helps with liquid ingredients. These gadgets aren’t essential luxuries—they’re practical investments that make the whole process smoother and more enjoyable. I’ve found most of these items on Amazon Associate pages or kitchen shops, though honestly, the basics (mixing bowl, whisk, spoon) are what really matter—fancy equipment just makes life easier.
The beauty of this no-bake cheesecake is that you don’t need a huge arsenal; what matters is having reliable, accurate tools that you trust. A saucepan comes in handy for melting butter, and quality wooden spoons prevent scratching your bowls while you fold gently. Some bakers include a food processor for efficiency with biscuit crushing, though the rolling pin method is equally effective and saves cleanup. One thing worth noting: check the Privacy Policy on kitchen retailer sites before ordering gadgets online—some have interesting data practices worth reviewing. The equipment mentioned here represents what I genuinely use regularly when making Mary Berry-style lemon cheesecake, not an exhaustive kitchen catalogue.
What Else Can You Make With Lemons?
Once you’ve mastered this Mary Berry Lemon Cheesecake Recipe, the lemon recipes possibilities become genuinely endless, and you’ll find yourself hunting for ways to use leftover lemons from your fruit bowl. Mary Berry’s lemon cupcakes are absolutely delightful and share that same bright citrus character; lemon drizzle cupcakes are equally brilliant for packed lunches or afternoon tea. If you want something more substantial, try a lemon sponge cake, or go savoury-adjacent with lemon biscuits that pair beautifully with cream cheese. The loaf family offers wonderful options like lemon blueberry loaf and lemon blueberry muffins, both of which give you that gorgeous fruit-citrus combination. For those wanting to stick with cheesecake variations, lemon meringue cheesecake brings a completely different texture, while lemon curd tarts and individual lemon tartlets offer pastry-based alternatives. Mary Berry’s iced lemon traybake is perfect for feeding a crowd, and if you love that meringue element, lemon meringue pie is classic for a reason. The lemon curd muffins bridge the gap between cake and curd beautifully. Honestly, once you’ve got lemons at home, you’ll be amazed how many lemon recipes you can create—it’s one of those ingredients that just keeps giving.
I’ve made pretty much every lemon dessert going, and what strikes me is how the flavour remains elegant across different applications. Whether you’re making a simple lemon sponge cake on a Tuesday or an impressive lemon meringue cheesecake for a celebration, lemons bring brightness and sophistication. The tart element prevents things from becoming cloying, which is why lemon recipes tend to work across all skill levels. Leftover lemons in your fruit bowl are genuinely too precious to waste—even if you don’t use them immediately, they’ll keep for weeks. My advice: find a lemon recipes collection (Mary Berry has loads), bookmark your favourites, and cycle through them seasonally. This lemon cheesecake is brilliant, but it’s also just the beginning of a delicious lemon-based journey through home baking.
Mary Berry Cookery Course: A Masterclass in Kitchen Confidence
If you’re serious about elevating your home cooking skills, the Mary Berry Cookery Course is genuinely worth your investment, particularly if you want to develop that professional approach to recipes like this lemon cheesecake. This step-by-step masterclass walks you through everything from fundamentals to showstoppers, with the queen of cooking herself guiding you through each technique. The book itself is a substantial collection of easy-to-follow recipes that build your confidence progressively—it’s not just instructions, it’s understanding the why behind each step. You’ll find sections dedicated to equipment recommendations, tips that save time, and tricks that professionals use but rarely share. What I particularly love is how it covers everything from mid-week meals (actual recipes that fit real life) to dinner party showstoppers (recipes that genuinely impress). The Mary Berry Cookery Course approach filters through her decades of experience, giving you shortcuts and insights that would take years to discover independently.
Beyond just recipes, this step-by-step masterclass teaches you the confidence to adapt and improvise within your home cooking—which is genuinely what separates competent bakers from creative cooks. You can find the Mary Berry Cookery Course through various retailers including Amazon, and it’s often reasonably priced. The book contains inspiring dishes that span all skill levels, and the easy-to-follow recipes are refreshingly straightforward without sacrificing sophistication. Whether you’re tackling this lemon cheesecake or exploring dinner party showstoppers, having her collection as reference genuinely elevates your cooking. The tips and tricks included are the sort of things that make the difference between something looking homemade-nice and genuinely impressive. This is the queen of cooking distilling her knowledge, so it’s worth taking seriously if you want to improve.
Mary Berry Lemon Cheesecake Recipe(FAQs)
Can I make a no-bake cheesecake without using the oven?
Yes. This is a completely no-bake lemon cheesecake, so there is no oven required. The cheesecake sets naturally in the refrigerator through chilling, making it an easy dessert to prepare.
Is this a quick and simple recipe?
Yes. The active preparation takes about 20 minutes, making it a quick and simple recipe. However, the cheesecake needs at least 4 hours of chilling, although leaving it overnight gives the best results.
Can I use different biscuits for the base?
Absolutely. Digestive biscuits are the traditional choice, but you can also use graham crackers or shortbread biscuits. Each option creates a slightly different texture while still producing a delicious cheesecake.
Should I use fresh or bottled lemon juice?
Fresh lemon juice is highly recommended because it provides a brighter citrus flavour and a fresher aroma. Bottled lemon juice can be used if needed, but the flavour is not quite as vibrant.
What type of tin works best?
A 20cm springform or loose-bottomed tin is ideal. It allows you to remove the cheesecake easily while keeping the edges neat and the presentation attractive.
Can I make this cheesecake ahead of time?
Yes. This cheesecake is perfect for making ahead. Prepare it the day before or leave it overnight in the refrigerator so it has enough time to set fully and develop its flavour.
How do I get clean slices?
Dip a thin, sharp knife into hot water and wipe it clean between each cut. This helps create smooth, neat slices that hold their shape.
How do I remove the cheesecake from the tin?
Run a thin knife around the edge of the cheesecake before gently releasing the sides of the springform tin. This helps prevent the cheesecake from sticking and keeps the edges smooth.
How long does the cheesecake need to set?
For the best texture, chill the cheesecake overnight. If you’re short on time, allow at least 4 hours, although a longer chilling time produces a firmer cheesecake that’s easier to slice.
How should I store leftover cheesecake?
Store the cheesecake covered in the refrigerator for up to 3 days. For longer storage, freeze it for up to 2 months. Thaw it overnight in the refrigerator before serving.
Try More Recipe
Mary berry lime and coconut cake recipe
Mary Berry Chocolate Orange Cheesecake Recipe
Mary Berry Lemon and Lime Cheesecake Recipe
Mary Berry Lemon Curd Cheesecake Recipe

Mary Berry Lemon Cheesecake Recipe
Ingredients
Equipment
Method
- Crush the digestive biscuits into fine crumbs and mix with the melted butter and demerara sugar.
- Press the mixture firmly into a lined 20cm springform tin and chill for 30 minutes.
- Beat the cream cheese, soft cheese, condensed milk, icing sugar, lemon zest, lime zest, lemon juice, lime juice, and vanilla extract until smooth.
- Whip the double cream to soft peaks and gently fold it into the cheesecake mixture.
- Spoon the filling onto the chilled biscuit base and smooth the top.
- Cover and refrigerate for at least 6 hours or overnight until fully set.
- Remove from the tin and decorate with lemon slices, lime slices, lemon zest curls, and a light dusting of icing sugar before serving.
Notes
- Fresh lemon juice gives the brightest citrus flavour.
- Chill overnight for the cleanest slices.
- Use a hot knife for neat servings.
- Store covered in the refrigerator for up to 3 days or freeze for up to 2 months.