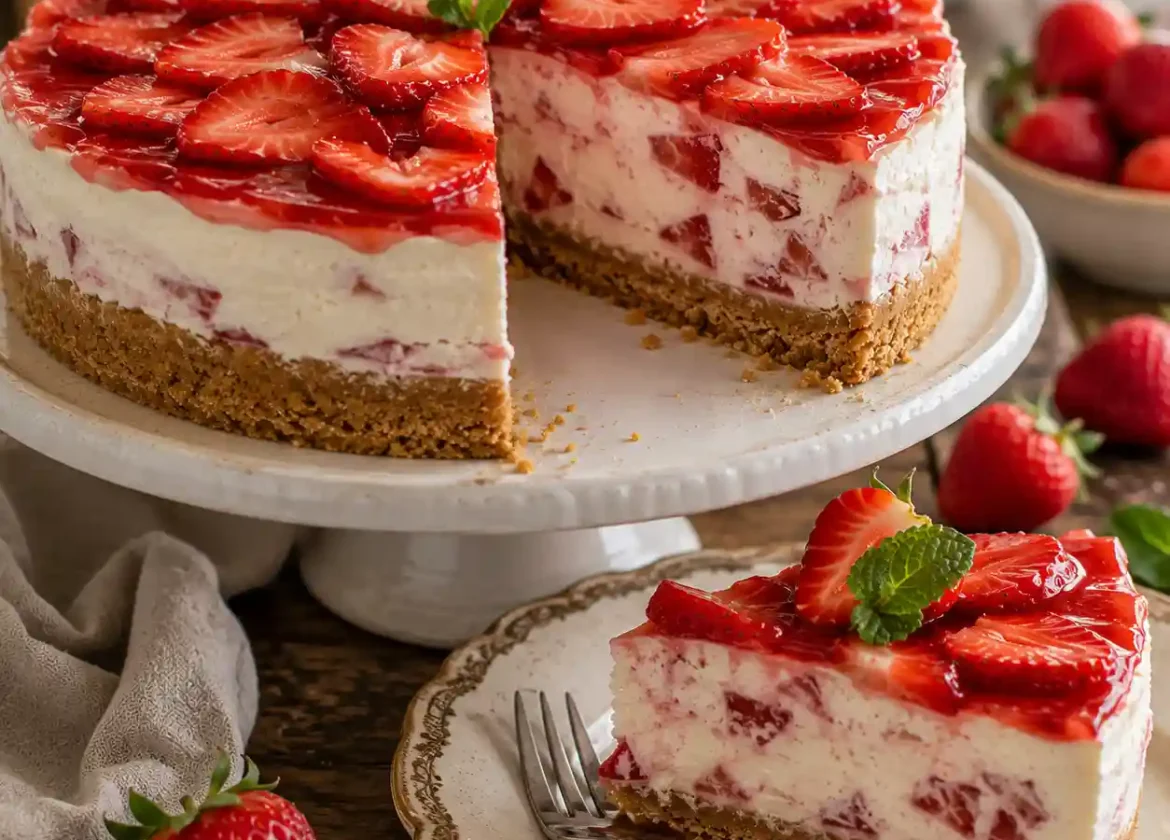
What Is Mary Berry’s No-Bake Strawberry Cheesecake?
This Mary Berry No-Bake Strawberry Cheesecake Recipe is one of those brilliant recipes that perfectly embodies Mary Berry’s approach to practical baking style and calm baking. At its heart, it’s a chilled dessert built on three essential components: a buttery biscuit base, a silky cream cheese filling brightened with fresh berries, and a whipped cream topping that brings everything together. What makes this creation so special is the balance it strikes—you get that perfect correct texture that feels indulgent without being heavy, and a clean flavor that lets the strawberries shine through. I’ve found that following Mary Berry’s philosophy of eliminating unnecessary steps means you can have this finished dessert without the fuss, just a beautiful mixture that’s been properly set and chilled.
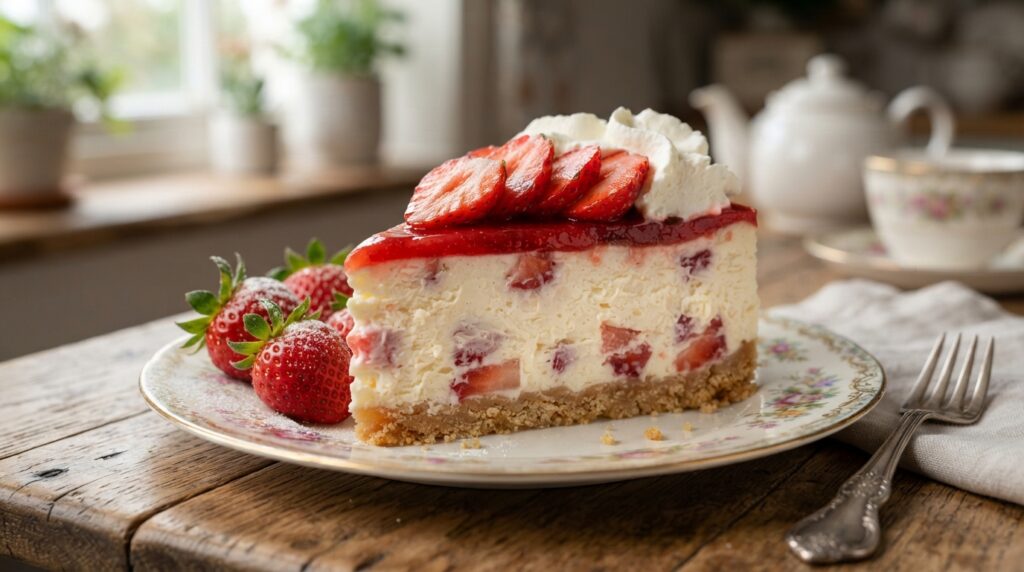
The genius of this design is its simplicity and reliability. There’s no overthinking required here—Mary Berry has distilled cheesecake making down to what actually matters, removing all the stress and complexity. The result is something approachable enough for complete beginners yet impressive enough to serve at your best dinner parties. What I appreciate most is that this isn’t some modernized shortcut; it’s a thoroughly tested, balanced recipe that stands on its own merits.
Why This Recipe Is Worth Trying
Honestly, once you realize this requires no oven, everything changes, especially when you’re facing warm weather or juggling busy days in the kitchen. This make-ahead approach means you can prepare it the night before—or even overnight—giving you genuine stress-free entertaining without last-minute panic. The fresh strawberry flavor comes through beautifully because nothing’s been baked away, and that natural sweetness of the berries paired with just enough icing sugar creates something genuinely light and refreshing. What I’ve discovered is that when properly chilled, the smooth texture and creamy texture become almost luxurious, yet it remains easy to slice cleanly into perfect portions.
The ingredient list reads like something you’d already have rattling about in your cupboards—everything is readily available and simple ingredients that are easy to work with. There’s no special technique required, no temperamental oven temperatures to monitor, just your fridge doing the heavy lifting. This makes it absolutely ideal for family meals, celebrations, or honestly, any day when you want something that tastes like you’ve gone to far more effort than you actually have.
Essential Ingredients to Make Mary Berry’s No-Bake Strawberry Cheesecake
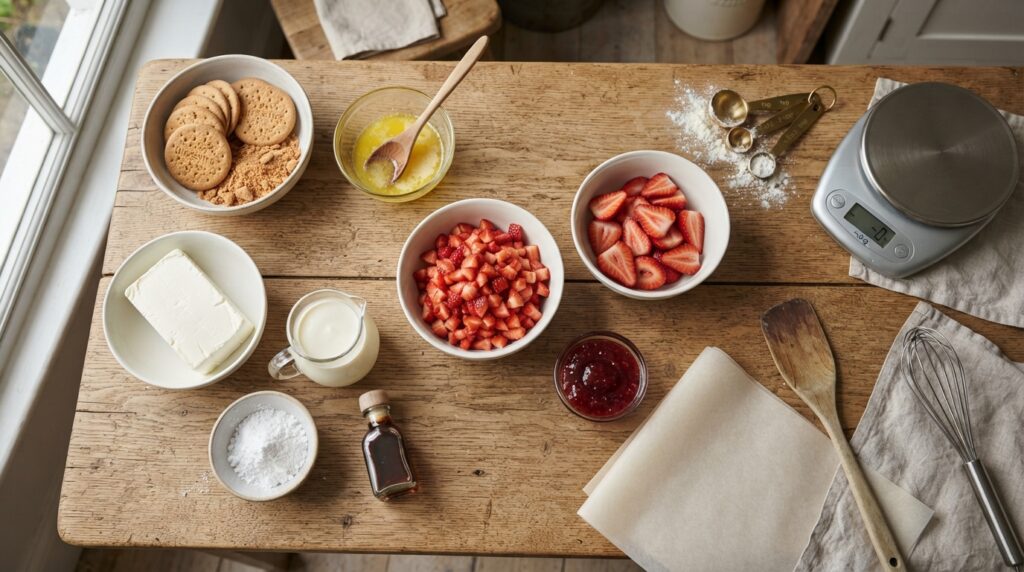
| Ingredient | Quantity | Purpose / Notes |
| Digestive biscuits | 200g | Forms the buttery biscuit base and provides structure. |
| Unsalted butter (melted) | 100g | Binds the biscuit crumbs together for a firm base. |
| Full-fat cream cheese | 400g | Creates a rich, creamy cheesecake filling with the signature tangy flavour. |
| Double cream | 600ml | Adds lightness, volume, and a silky, airy texture. |
| Icing sugar | 100g | Sweetens the filling while keeping it smooth. |
| Vanilla extract | 1 teaspoon | Enhances the overall flavour of the cheesecake. |
| Fresh strawberries (finely chopped/lightly crushed) | 300g | Folded into the filling to add fresh strawberry flavour, natural sweetness, and colour. |
| Fresh strawberries (sliced) | 250g | Used as the strawberry topping for freshness and presentation. |
| Strawberry jam (gently warmed) | 2 tablespoons | Brushed over the strawberries to create a glossy finish and extra flavour. |
Handy Kitchen Tools for Best Results
Get yourself a springform cake tin (ideally 20–23cm, though 20cm works perfectly fine)—the loose-bottomed tin design makes unmoulding stress-free and keeps your presentation looking professional. Beyond that, you’ll want large mixing bowl (or several mixing bowls if you’re organized), an electric whisk for creating stable filling with airy filling that holds soft peaks beautifully, and a sturdy spatula for folding without deflating your carefully whipped cream. A food processor speeds up biscuit crushing, though a rolling pin and baking parchment in a bag work just as well if you prefer the therapeutic back-of-spoon method—there’s something satisfying about crushing biscuits evenly by hand anyway.
The truth is, you don’t need fancy equipment to make this work brilliantly. I’ve made this dozens of times with basic kitchen tools, and honestly, the lack of specialized kit doesn’t hold you back one bit. What matters more is having that springform tin for clean removal and a good whisk that’ll give you proper airy filling. Everything else is just helpful shortcuts that make the process smoother.
Step-by-Step Guide to Making Mary Berry No-Bake Strawberry Cheesecake
Start by preparing your setup: prepare tin by lining the base with baking parchment, then prepare base by taking 200g of digestive biscuits and working them into fine crumbs—whether through a processor or the satisfying ritual of crushing biscuits in a bag with a rolling pin. Combine butter the melted butter with your crushed biscuits until it resembles damp sand, then press firmly into your tin, creating an even layer using the back of spoon. Chill base in the refrigerator for at least 20 minutes—longer is fine and actually helps it firm while you tackle the filling.
For the main event, soften cream cheese at room temperature, then prepare filling by beating it smooth until completely lump-free. Sweeten with icing sugar and add your vanilla extract, continuing to beat until genuinely creamy. In a separate bowl, whip cream until soft peaks form—this is crucial for that airy filling. Now comes the magic: add strawberries (your chopped fresh strawberries and lightly crushed strawberries), gently fold everything together with your spatula, then carefully fold in those soft peaks of whipped cream. Spoon filling onto your prepared tin, using your spatula to create a smooth top, then chill until set—ideally overnight, though at least 4 hours works if you’re pressed for time.
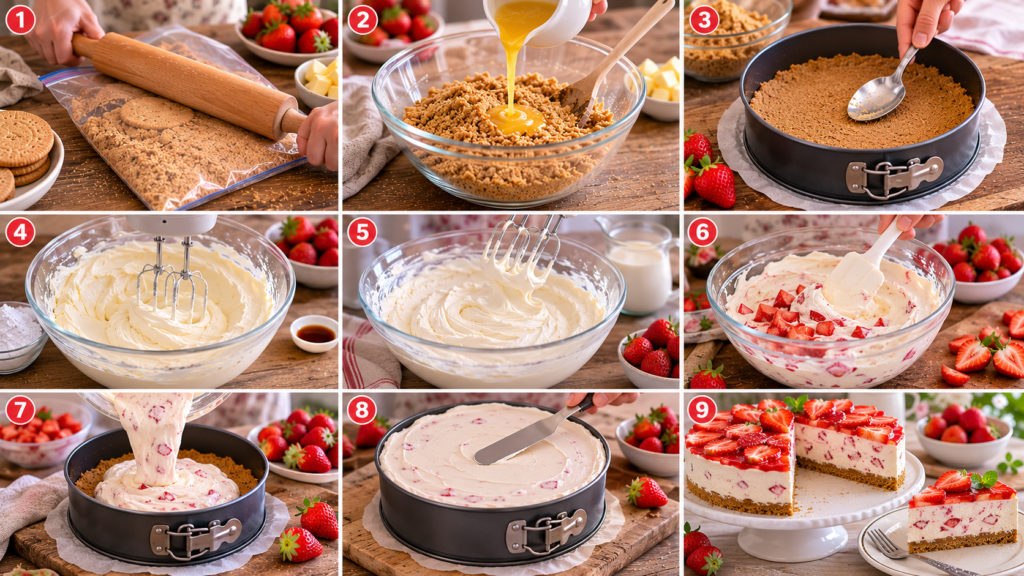
Final touches make all the difference: arrange sliced strawberries across the top in whatever pattern pleases you, then brush with your gently warmed strawberry jam for that glossy finish. Let it chill until firm one final time, and when you’re ready to present it, carefully remove cheesecake using a warm knife (running it under hot water between slices helps it easy to slice cleanly). The cheesecake mixture should evenly distributed beautifully, and everything should easy to slice into perfect portions ready to serve to appreciative faces.
Healthier Version of Mary Berry No-Bake Strawberry Cheesecake
If you’re looking to enjoy this beloved dessert without the guilt, tweaking a few elements makes a real difference without sacrificing taste. Start by using reduced sugar—I typically cut the icing sugar down by about a third and let the natural sweetness of extra fruit topping do the heavy lifting instead. A thinner biscuit base means you’re using less butter overall, and honestly, you barely notice the difference because the creamy middle and strawberry layers are what people actually remember. The key to making this work is embracing smaller portions—serve it in elegant, restrained slices, and suddenly it feels like balanced indulgence rather than overindulgence. This approach keeps everything tasting proper and satisfying while genuinely reducing calories and sugar content.
What I’ve discovered is that by respecting the fundamentals, you can reduce without losing charm. The strawberries become your secret weapon here—pile on the fruit, and no one misses extra sugar. I’ve served this lighter version to guests who were expecting sacrifice and watching them enjoy it without realizing it’s the healthier option is genuinely rewarding. The natural sweetness really does shine when you’re not competing against processed sugar, and the whole thing feels fresher, more vibrant.
Ingredient Substitutions for Mary Berry No-Bake Strawberry Cheesecake
Don’t feel locked into the exact ingredients—this recipe happily accommodates swaps depending on what you have or your dietary needs. Graham crackers work brilliantly as a base swap for digestives if you’re in North America or just prefer them; the base building technique remains identical. For the berries, frozen strawberries are genuinely useful when fresh ones are expensive or out of season—just remember to thaw completely and drain well to avoid a watery situation (more on that shortly). The filling can pivot toward mascarpone for extra richness if you fancy something silkier, though full-fat cream cheese remains my preference. If you’re managing dietary needs, gluten-free biscuits slot straight in with zero fuss, and margarine substitutes for butter if needed, though I’ll confess real butter creates superior flavor.
A lesser-known adjustment I love is adding lemon zest to the whipping cream—it cuts through richness beautifully and adds brightness. These substitutions show how adaptable this cheesecake truly is; it’s robust enough to handle changes while still tasting distinctly itself. I’ve played with nearly every variation here, and the magic is that none of them break the recipe.
Expert Tips to Make Perfect Mary Berry No-Bake Strawberry Cheesecake
The difference between a mediocre and magnificent cheesecake often comes down to technical details that seem minor until you understand them. Always reach for full-fat cream cheese—this isn’t where to economize because texture depends on it. If your cheesecake not setting properly, the culprit is usually one of two things: either you haven’t chill long enough (aim for at least 6 hours, though overnight is genuinely best result), or you’ve committed the cardinal sin of overmixing. This is where folding gently becomes gospel—once cream enters the picture, stop beating and switch to folding, which preserves that airy filling you’ve worked to build with soft peaks. Dry strawberries are also crucial; prevent excess moisture by chopping finely (not puréeing, which releases juice), and if using frozen fruit, ensure they’re thoroughly thawed and well-drained.
For slicing success, press base firmly when constructing to create a firm biscuit base that won’t prevent crumbling and lose structural integrity. Butter and proper pressing help everything solidify and hold together. When removal time comes, chill your knife—running it under warm water and wiping between cuts prevents mess. A thin knife or springform clip makes removing cheesecake neatly infinitely easier; work gently around the edge to maintain clean shape and achieve those neat slices and clean slices everyone photographs. I always cover while chilling to prevent drying, and allowing the filling to firm up properly transforms the entire eating experience—rushing this step genuinely matters less than you’d think once everything gets adequate resting time.
Creative Ways to Customize Mary Berry No-Bake Strawberry Cheesecake
Once you’ve mastered the classic, the variations become genuinely fun. A chocolate biscuit base adds instant sophistication—it creates depth and contrast against the pale cream that makes the whole thing feel restaurant-worthy. For visual drama, create a strawberry swirl by drizzling purée across the surface before final chilling; it looks professional and tastes like intentional design. Mini cheesecake jars transform this into individual servings perfect for dinner parties where you want to skip the slicing entirely—guests love the charm of getting their own small vessel. A mixed berry version incorporating raspberries alongside your strawberries deepens the fruit flavor considerably, or try layering white chocolate into the filling itself for something richer and slightly different. These aren’t complicated additions, just thoughtful pivots that keep the recipe feeling fresh even after you’ve made it several times.
What I Got Wrong (And How I Fixed It)
Looking back at my early attempts, I made predictable mistakes that actually taught me plenty. My first disaster was a runny filling caused by whipping cream to actual peaks instead of soft ones—I thought more volume meant better texture, but over-whisked cream collapses and releases moisture. That same batch suffered from a soft base because I didn’t press firmly enough and skipped adequate chilling, so the whole thing felt structurally compromised. Another failure was using watery strawberries that hadn’t been properly dried; I learned the hard way that chopping finely matters more than any other fruit prep, and that puréeing (which I initially tried for even distribution) actually worsens the moisture problem. Extra chilling time fixed most of these issues—I discovered that what felt like overkill (leaving it overnight when a few hours seemed enough) actually transformed texture completely. The breakthrough came when I stopped overmixing and started folding gently, which maintained that elusive light texture everyone loves. Slicing taught me that temperature matters—a cold knife versus warm one produces dramatically different results. These lessons, learned through genuine failure, shaped how I approach the recipe now.
Pairing Ideas: What to Serve With Mary Berry No-Bake Strawberry Cheesecake
The beauty of this light dessert is its versatility in the meal structure. Serve chilled with fresh strawberry slices and extra fresh strawberries arranged alongside for extra flavor impact and visual presentation—this immediately signals to guests you’ve gone to genuine effort. A dollop of lightly whipped cream or light whipped cream adds softness without heaviness, while a generous drizzle of strawberry coulis (essentially smooth strawberry sauce) contributes both color and gentle sweetness that complements without overwhelming.
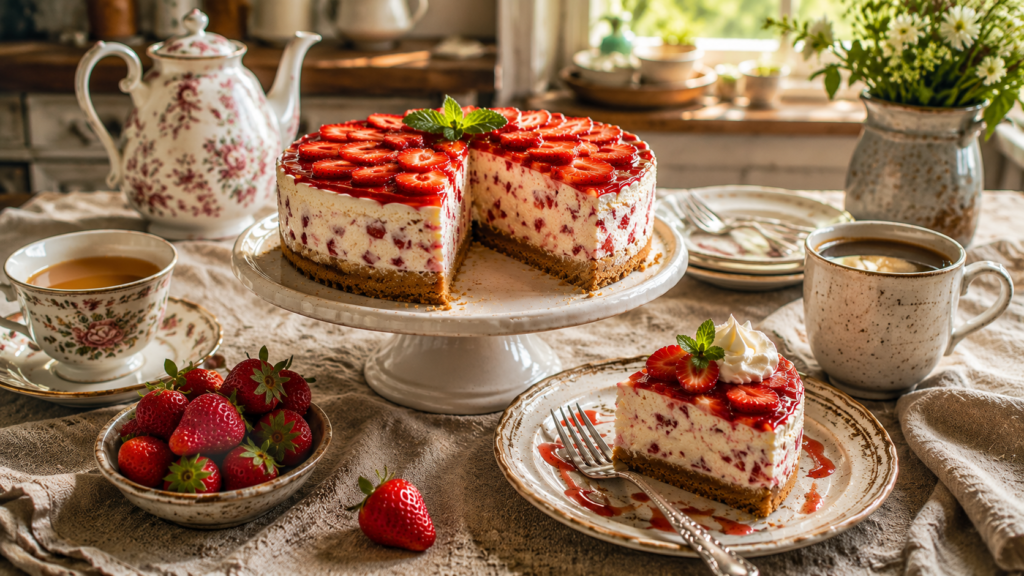
Finish with mint leaves as a garnish for that fresh finish that makes everything feel intentional. As a side, this pairs brilliantly with tea or coffee—I’ve served it after light lunches where something rich would feel wrong, and the neat slices presentation makes plating elegant without fuss.
Storing Mary Berry No-Bake Strawberry Cheesecake the Right Way
Once your masterpiece is ready, proper storage determines whether it stays brilliant or disappoints. Chill fully before doing anything else, and always keep it refrigerated in the fridge—this isn’t a room temperature dessert. Store covered using cling film or foil to maintain shape and protect against flavor contamination (a real concern because cheesecake absorbs smells from strong surrounding fridge odors). Keep it in an airtight container if you have one; this preserves freshness beautifully and prevents the strawberry topping from drying out. The dairy elements remain safe for up to 3 days, which is genuinely practical for most households. If you’re thinking longer term, freezing works wonderfully—freeze slices individually on a tray before wrapping, and they’ll keep for up to 2 months without quality loss, making this perfect for making ahead when entertaining feels overwhelming.
When you’re ready to enjoy frozen portions, thaw slowly by transferring to the fridge and letting them thaw overnight—rushing this step with room temperature defrosting affects texture negatively. The serving window matters; I’ve learned that letting it sit at room temperature for roughly 1 hour before eating brings out subtle flavor notes that cold-straight-from-fridge versions miss. This simple patience step genuinely transforms the eating experience without complicated reheating required.
How to Reheat Mary Berry No-Bake Strawberry Cheesecake (If Needed)
Here’s the liberating truth: this dessert is served chilled and honestly doesn’t need reheating at all—that’s part of its appeal. If you’ve inadvertently removed it from the fridge and it’s warmed slightly at room temperature for few minutes, simply returning it to chill for a few minutes restores everything perfectly. The critical thing to understand is that heat genuinely affects set negatively with no-bake preparations, potentially destabilizing that carefully constructed texture. Unlike baked cheesecakes, this one thrives on consistent coldness, so if serving after time out of the fridge, I’d recommend returning it rather than attempting any warming method.
Nutritional Breakdown (Per Serving)
Understanding what you’re serving helps with portion planning and menu balancing. Each neat slices contains approximately 390 kcal, which sits in the moderate to high range, making this something to enjoy rather than mindlessly consume. Carbohydrates clock in around 30g (largely from the biscuits and added sugar), while protein hovers at roughly 5g thanks to the dairy components. The fat content reaches 28g, primarily from cream and butter, with saturated fat at 17g—honestly, it’s indulgent, which is precisely the point. Sodium stays reasonable at 230mg, and you’re getting meaningful vitamin C from those fresh strawberries. These nutrition values are approximate and will vary based on your specific ingredients, so treat them as guidelines rather than absolutes.
Wrapping It Up
Mary Berry’s No-Bake Strawberry Cheesecake has genuinely earned its reputation as the dependable, crowd-pleasing dessert that solves entertaining anxiety. It’s fresh, light, yet wonderfully comforting with that creamy texture everyone craves paired with genuine natural strawberry flavor. The simple method makes it accessible for everyday treats while feeling special enough for special occasions—you can prepare it effortlessly without sacrificing sophistication or taste.
Mary Berry No-Bake Strawberry Cheesecake Recipe (FAQs)
Q: Why is my cheesecake runny?
A: A runny cheesecake is usually caused by one of three reasons: it has not been chilled for long enough, the whipped cream was not beaten to soft peaks, or excess moisture from the strawberries has made the filling too wet. Chill the cheesecake for at least 6 hours, or preferably overnight, for the best texture. Always use fresh strawberries, pat them dry thoroughly, and avoid cooked strawberries as they release extra liquid. If using frozen strawberries, thaw them completely, drain them well on kitchen paper, and chill them slowly in the fridge before adding them to the filling. Finely chop the strawberries instead of puréeing them, as purée releases more liquid and can prevent the cheesecake from setting properly.
Q: Can I substitute the ingredients?
A: Yes. Digestive biscuits can be replaced with graham crackers or other plain biscuits with a buttery flavour. Double cream is recommended for the filling, although some people prefer adding whipped cream during assembly for a slightly different texture. If you want an extra-firm cheesecake, you can dissolve a small amount of gelatin in warm liquid and mix it into the filling before chilling. However, with proper chilling, gelatin is usually unnecessary. When combining the ingredients, always fold the mixture gently rather than beating it to keep the filling light and airy.
Q: Can I make this cheesecake ahead of time, and how should I store and serve it?
A: Yes. This cheesecake is ideal for making a day in advance, as the extra chilling time improves its texture. You can also freeze individual slices for up to 2 months. When serving frozen cheesecake, thaw it slowly in the refrigerator rather than at room temperature. After assembling the cheesecake, allow it to chill for at least 4 hours, although overnight chilling produces the firmest set and cleanest slices. For neat slices, use a warm, damp knife and wipe it clean between each cut.
Try More Recipes
Mary berry chocolate chip banana bread recipe
Mary berry lime and coconut cake recipe
Mary Berry Buttermilk Pancakes Recipe
Mary Berry Ginger And White Chocolate Cheesecake Recipe
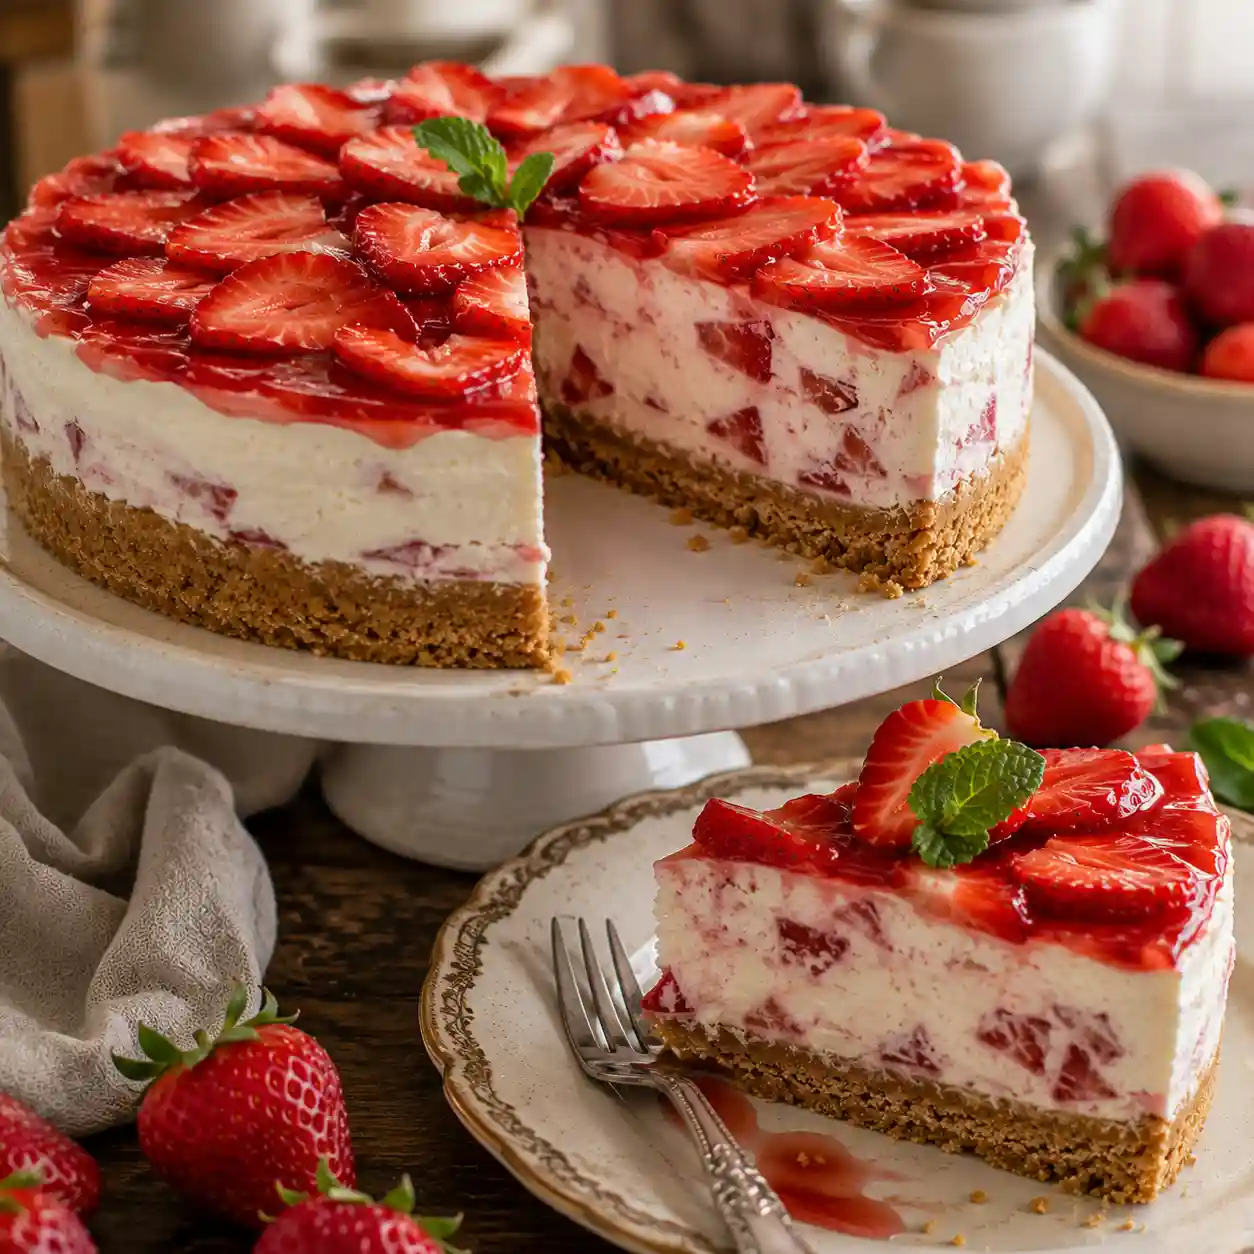

Mary Berry No-Bake Strawberry Cheesecake Recipe
Ingredients
Equipment
Method
- Line a 20cm springform tin with baking parchment.
- Crush the digestive biscuits into fine crumbs.
- Mix the biscuit crumbs with the melted butter until evenly coated.
- Press the mixture firmly into the base of the tin.
- Chill the base for 20 minutes.
- Beat the cream cheese until smooth.
- Add the icing sugar and vanilla extract, then mix until creamy.
- In another bowl, whip the double cream to soft peaks.
- Fold the whipped cream gently into the cream cheese mixture.
- Fold in the chopped strawberries until evenly combined.
- Spoon the filling over the chilled biscuit base and smooth the top.
- Refrigerate for at least 6 hours or overnight.
- Arrange the sliced strawberries on top.
- Brush the strawberries with the warmed strawberry jam for a glossy finish.
- Slice using a warm knife and serve chilled.
Notes
- Use full-fat cream cheese for the best texture.
- Pat the strawberries dry before mixing into the filling.
- Chill overnight for cleaner slices.
- Wipe the knife clean between slices for a professional finish.
- Do not overmix after adding the whipped cream