
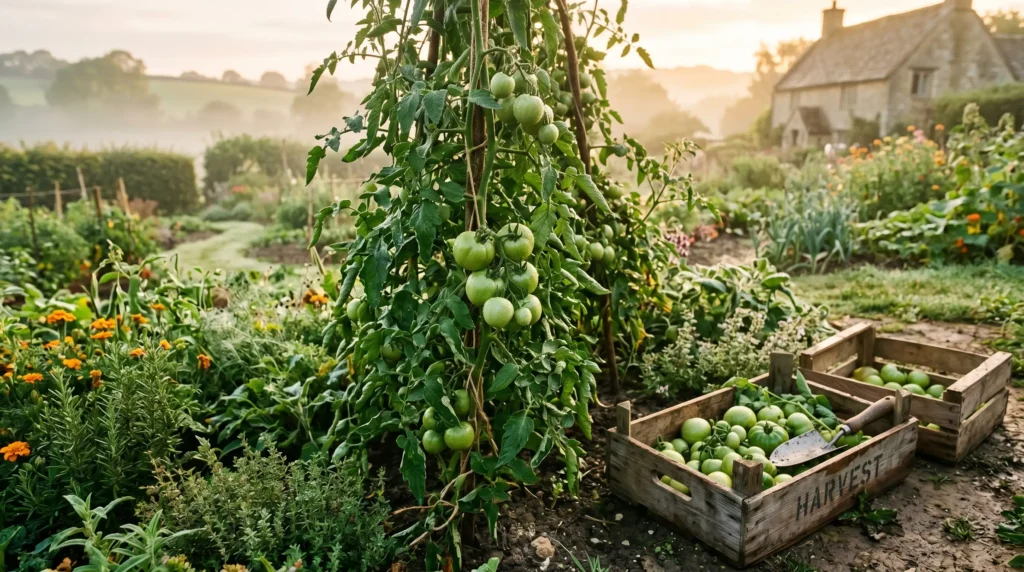
If you’ve ever stood in the garden at the end of season staring at a glut of green tomatoes that simply refuse to ripen, you’ll know exactly why this Mary Berry green tomato chutney recipe feels like such a relief. I remember my first batch — I had no idea that those firm, unripe tomatoes could turn into something so rich, tangy, and deeply flavorful. What makes this recipe truly special is how it transforms what might otherwise go to waste into a thick, spoonable condiment with a beautiful balance of sweetness and sharpness. It is completely beginner-friendly, needs only simple ingredients like onions, apples, vinegar, and sugar, and the total time of around 1 hour 30 minutes makes it one of the most rewarding one-pot preserving projects you can take on. Simmered gently and slow-cooked with warm spices, the texture develops beautifully over time, and the patience you put in pays off in every jar.
What I love most about this Mary Berry chutney is how well it stores and how much better it tastes after a few weeks of maturing. Once it matures, it becomes the kind of preserve with an impressive shelf life that fits into countless dishes — from cheese boards and cold meats to sandwiches, holiday platters, and even alongside roasted meats. I’ve served it with Crème Fraîche-topped dishes, paired it next to a Lasagne, and even gifted jars alongside Apple Chutney and Quince Jelly at Christmas. Whether you are storing it for yourself or gifting and serving it throughout the year, this balanced, spiced, straightforward solution for fruits and vegetables from the garden sits comfortably among the finest cooking recipes in books and literature dedicated to British home preserving.
What Makes Mary Berry’s Green Tomato Chutney So Good?
At its heart, Mary Berry’s green tomato chutney is a slow-cooked mixture of firm, unripe tomatoes, apples, onions, sugar, and vinegar — and honestly, the first time I made it, I was surprised by how something this simple could taste so deeply rich and tangy. There is something almost magical about watching those hard, pale green tomatoes slowly break down in the pan and transforms into a thick, glossy condiment that smells absolutely incredible. The slow cooking is what does all the work here — it pulls the sharpness out of the tomatoes, softens the apples and onions, and lets the sugar and vinegar build that perfect balance of sweet and sour that makes this chutney genuinely hard to stop eating.
What really sets this apart from other preserves is how well it works across the whole year — whether you are storing it in the cupboard for yourself, gifting it to someone who appreciates homemade food, or serving it straight from a freshly opened jar at the table. I have brought jars of this to dinner parties and given them as Christmas gifts, and the reaction is always the same — people cannot believe it started as a pile of unripe tomatoes from the garden. This chutney is truly perfect for any occasion.
Why You Should Make This Chutney at Least Once
There are so many preserving recipes out there, but very few give you this much return for such little effort — and that is exactly why this one stands out. Every season, when gardens and markets are full of unripe tomatoes that nobody quite knows what to do with, this one-pot recipe quietly solves the problem. I tried it for the first time as a complete beginner, and what struck me most was how the warm spices worked alongside the sweet and tangy elements to create such a balanced flavor without needing any special skill or equipment. The slow simmer does everything for you, and by the end you have jars of something genuinely impressive sitting on your shelf.

The other thing that keeps me coming back to this recipe is its long shelf life and just how well it fits into everyday eating. Once you have a few jars ready, you will find yourself reaching for it with countless dishes — a strong cheese board, a plate of roasted meats, a quick sandwich, or even a holiday spread. It is also one of the most thoughtful gifting options I have found, because it feels homemade and personal without being complicated. For beginners especially, this recipe builds real confidence in the kitchen and delivers results that genuinely impress.
My End-of-Season Green Tomato Chutney
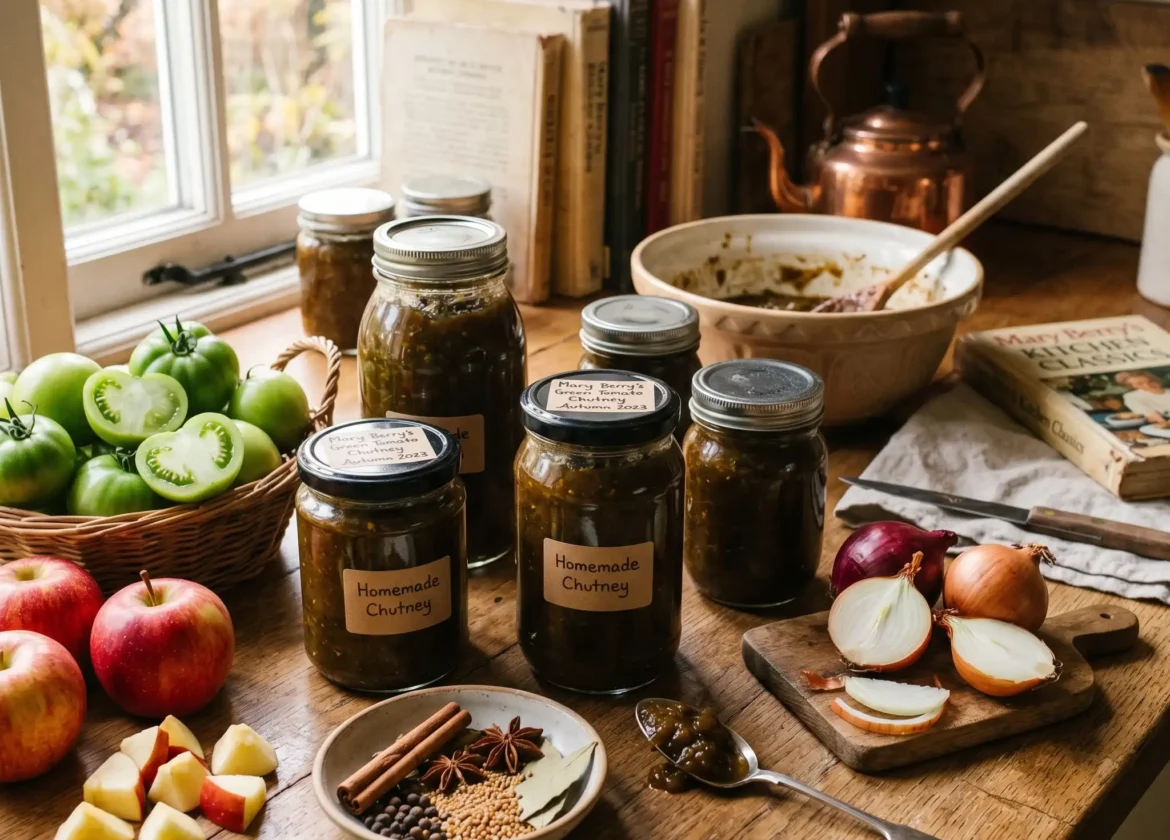
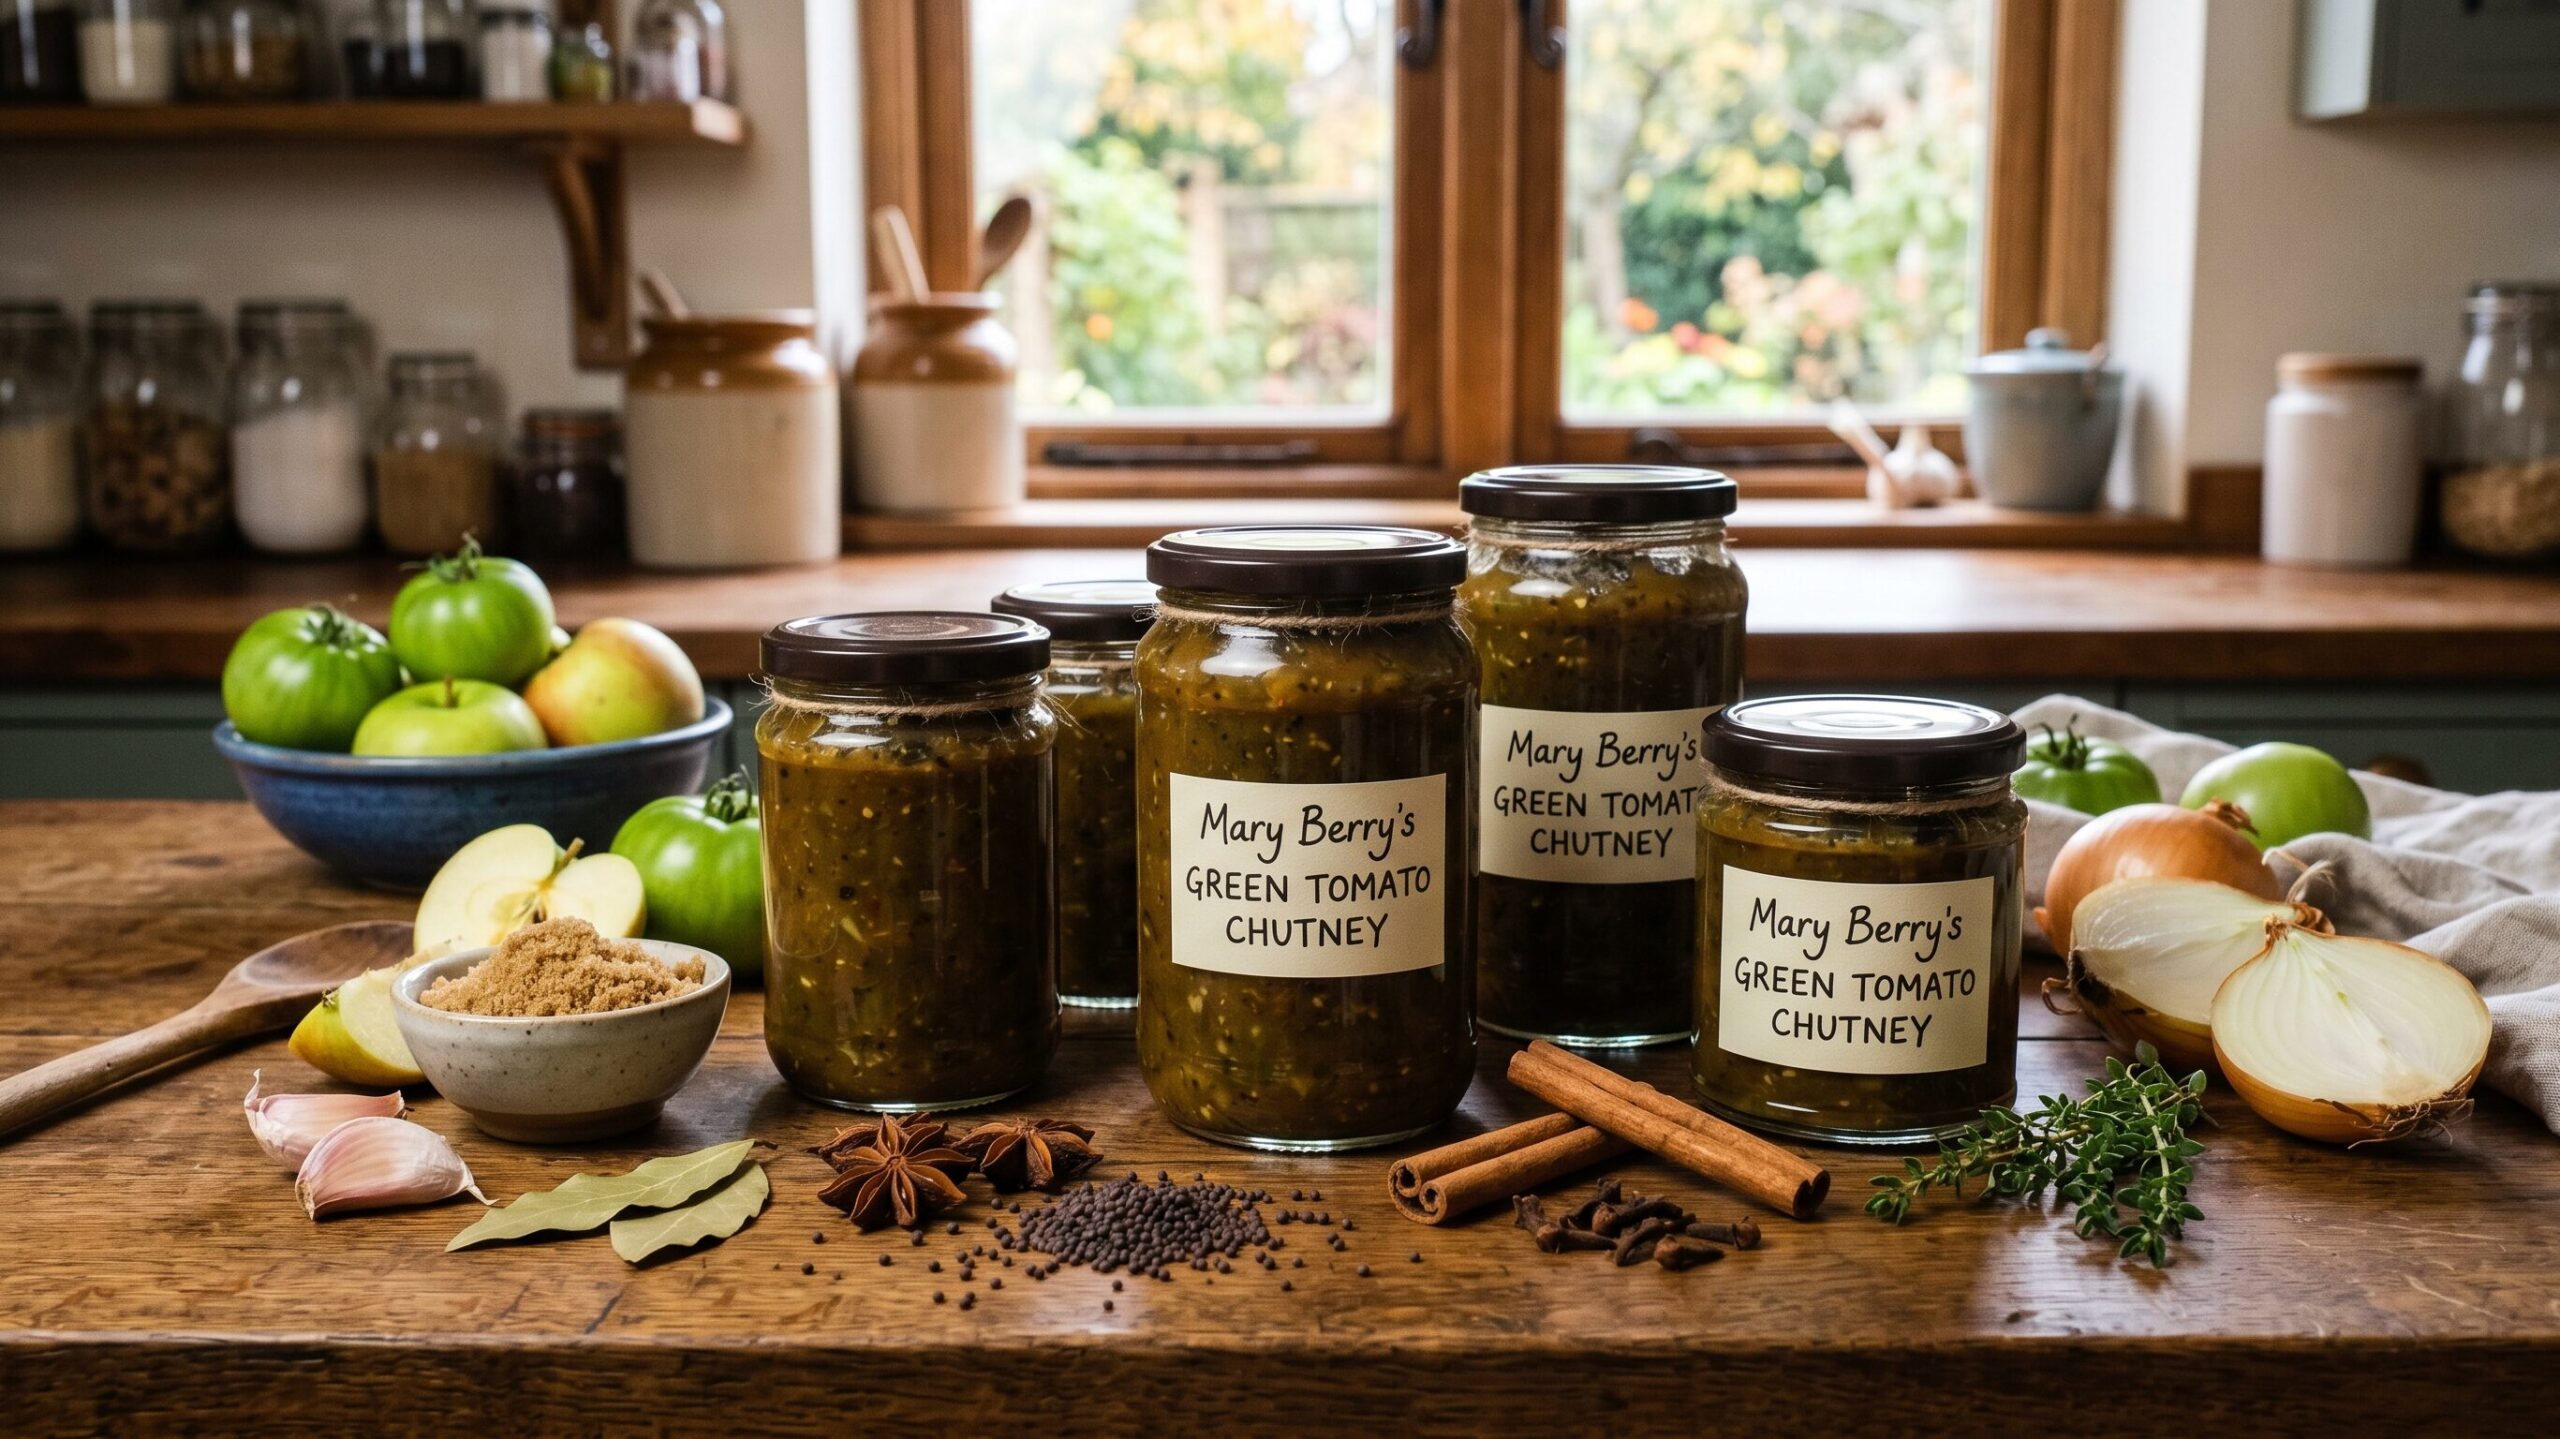
There is something deeply satisfying about late summer when the growing season is winding down and you spot those last green tomatoes still hanging stubbornly on the vine, refusing to ripen. That is exactly where this classic chutney was born in my own kitchen — out of a desire not to let those firm, unripe fruits go to waste. With just 25 mins of prep and 1.5 – 2 hours of simmering, you get 6 x 450g jars of something truly special. The gentle simmer fills the room with a tangy aroma that is the very essence of autumn preserving — comforting, warm, and completely unhurried. I find the whole process oddly relaxing; you just stir occasionally, let the sharp apples, sweet onions, and spices do their work, and slowly watch a beautiful depth of flavour build in the pan.
By the time the afternoon is done, your pantry shelf is lined with glistening jars of spiced green tomato chutney that only get better with time — a proper reward for very little effort. This has become a family favourite and a quiet tradition in my home every year, something I look forward to as much as any garden harvest. A jar makes a genuinely thoughtful homemade gift or a gift for anyone who appreciates real food, and it is pure perfection served alongside a Ploughman’s lunch or a loaded cheeseboard through the long winter months. Every batch carries that same honest satisfaction that only tradition and good autumn preserving can bring.
Why This Green Tomato Chutney Recipe Always Delivers
The hallmark of any great chutney is a balance between sharp and sweet, and this recipe nails it every single time. The combination of malt vinegar and demerara sugar is what creates that deep, rounded base — not too harsh, not too sugary — just right. What I personally love is the role that Bramley cooking apples play here. They bring a natural tartness that lifts the whole condiment, and more importantly, they carry natural pectin which helps everything set into that thick consistency that makes this chutney so satisfying to spoon out of the jar. I have tried other varieties and nothing works quite as well — Bramley really is the one.
The magic truly happens during the long, slow simmer, where all the fruit, vegetables, and spices gradually meld together into something far more complex than the individual ingredients would ever suggest. The flavours build slowly, deepening with every passing minute on the heat, and by the time the chutney is ready, it has transformed into a beautiful, deeply satisfying condiment that feels nothing like a simple kitchen project. Every time I lift the lid and smell that rich, spiced steam rising from the pan, I am reminded why this process is worth every bit of the wait.
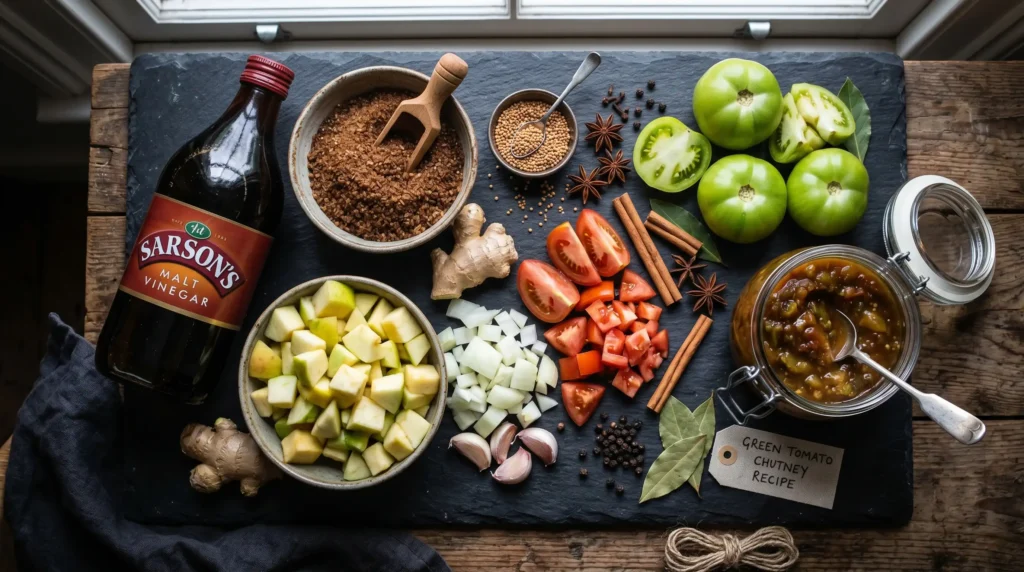
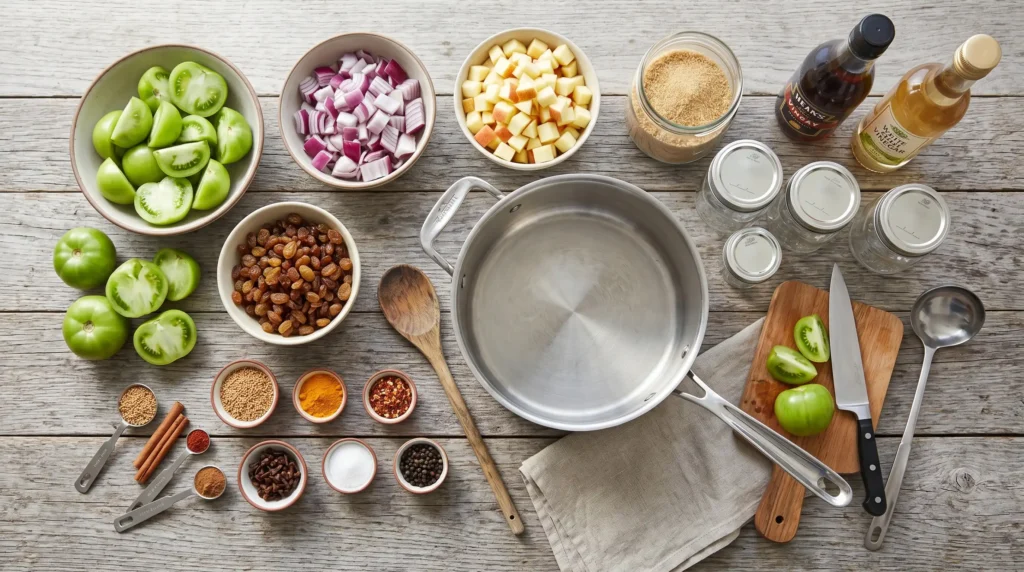
Everything You Need to Make This Chutney
| Ingredient | Quantity | Preparation |
| Green tomatoes | 1kg (or 1.5kg for larger batch) | Chopped / roughly chopped |
| Onions | 500g (or 750g for larger batch) | Finely sliced |
| Cooking apples / Bramley apples | 250g (+ 250g extra for larger batch) | Peeled, cored, chopped |
| Sultanas / raisins | 200g | Ready to use |
| Garlic cloves | 2 | Crushed |
| Fresh ginger | 1 tbsp | Grated |
| Ground allspice | 1 tsp | Ready to use |
| Ground cinnamon | 1 tsp | Ready to use |
| Mustard seeds | 1 tsp | Ready to use |
| Ground ginger | 1 tsp | Ready to use |
| Cayenne pepper / chilli flakes | ½ tsp | Ready to use |
| Salt | Pinch | Ready to use |
| Lemon zest | 1 lemon | Zest only |
| Seasoning | 2 tbsp | Ready to use |
| Malt vinegar / cider vinegar | 500ml – 900ml (+ 300ml for larger batch) | Ready to use |
| Light brown sugar / demerara sugar / brown sugar | 500g – 750g | Ready to use |
| Equipment | Purpose |
| Large heavy-based saucepan / large preserving pan | Main cooking vessel — prevents scorching |
| Long-handled wooden spoon / wooden spoon | Safe stirring when mixture gets hot and thick |
| Chopping board | Prep surface for all ingredients |
| Sharp knife | Cutting and dicing ingredients evenly |
| Ladle | Transferring chutney into jars |
| Jam funnel / heatproof funnel | Clean and easy potting without spillage |
| 6–7 sterilised 450g glass jars | Storage — must be warm before filling |
| Vinegar-proof lids / sterilised jars with lids | Sealing — protects against acidity over time |
How to Prepare and Cook This Classic Chutney
Before anything goes near the stove, take a moment to sterilise your jars properly — this one step decides how long your chutney keeps safely. Do it by washing them in hot soapy water, rinsing thoroughly, then placing them upside down in a low oven at 120°C until completely dry. While the jars are warming, get your produce ready. Chop the green tomatoes into rough chunks, slice the onions thinly, and dice the apples into pieces of an even size so everything will cook uniformly. I’ve rushed this prep stage before and ended up with mushy apples sitting next to undercooked tomato pieces — trust me, a little patience here pays off later. Once everything is ready, tip all your prepared ingredients into a large saucepan, pour in the vinegar and sugar, and stir well to combine before turning on the heat.
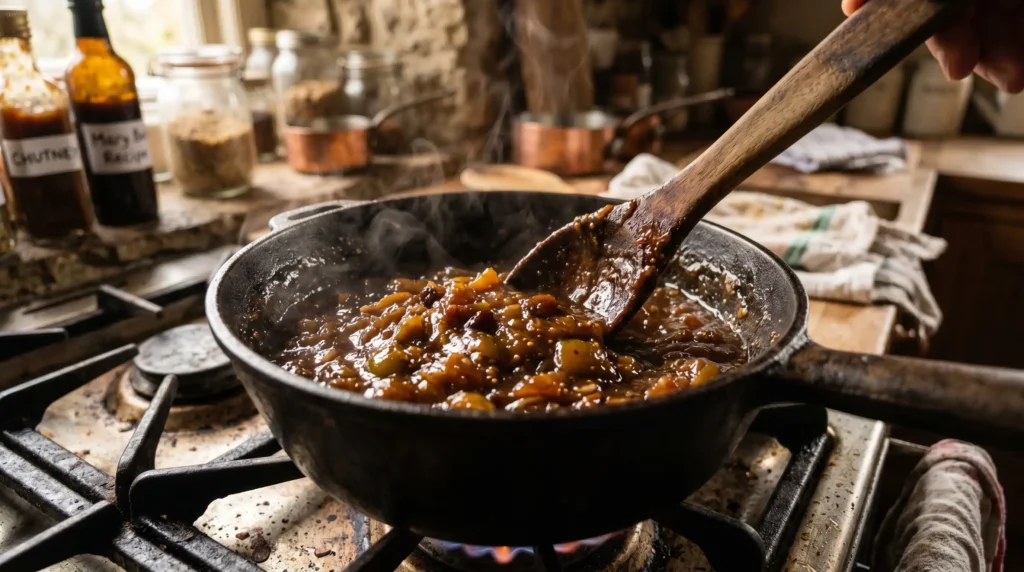
Warm the mixture gently until the sugar is fully dissolved, then bring it to a gentle boil before reducing to a steady simmer. Leave it uncovered for 60–75 minutes, stirring occasionally to prevent sticking, as the chutney slowly thickens into something rich and glossy. The test I always use — drag a spoon across the base of the pan; if it leaves a clear path that holds for a second or two, you’re there. It should feel thick but slightly loose since it cools to a firmer set. Now ladle the hot chutney carefully into your warm sterilised jars, seal with tight lids, and move them somewhere cool and dark to rest. Give it at least 2 weeks to mature — the wait genuinely transforms it into its best flavour.
How to Make This Chutney Step by Step
Start with a good prep — dice your green tomatoes, apples, and onions into similar-sized pieces so everything cook evenly and breaks down at the same rate. This small detail made a noticeable difference in my own batches, where unevenly cut pieces left some chunks too firm while others turned mushy. Once everything is ready, combine them all into a large saucepan along with the sugar, vinegar, spices, garlic, salt, and lemon zest — give it a good stirring to bring it all together. Place the pan over a medium heat and wait until the sugar dissolves completely before turning up the heat to bring the mixture to a boil. Watch it carefully at this stage — once it starts bubbling, reduce heat to low so it simmers gently and steadily.
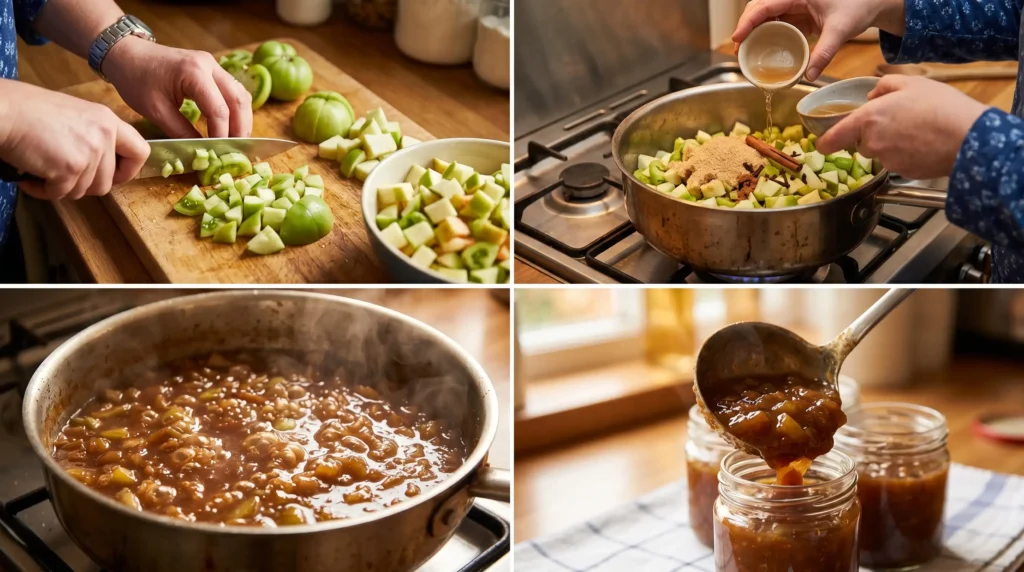
From here, let the chutney cook uncovered for 1 to 1.5 hours, stirring every now and then to prevent sticking at the base. You will know it is ready when it turns thick and glossy and a spoon dragged across the bottom leaves a clear trail with no watery liquid rushing back in — that moment never gets old no matter how many times I have made it. Carefully ladle the hot chutney into sterilized jars and seal them immediately while still hot. Then comes the hardest part — waiting. Set the jars aside for at least 2 weeks before serving, allowing the flavors to fully mature and deepen into that rich, rounded shape of taste that makes this chutney so worth every bit of effort.
Step-by-Step Instructions for Perfect Results
Before anything goes near the stove, sort your jars and lids first — wash them thoroughly in hot soapy water, rinse well, and place them upside down on a baking tray in a cool oven set to 140°C, 120°C Fan, or Gas 1 to sterilise while you get everything else ready. This step is one I used to skip in my early days of preserving, and it cost me more than one batch of spoiled chutney — so trust me, it is worth doing properly. While the jars heat up, prepare your green tomatoes, onions, and apples and tip them into a large heavy-based saucepan or preserving pan along with the sultanas, salt, spices, and malt vinegar. Give everything a good stir to combine, then place over a medium heat and bring slowly to a boil, stirring occasionally to prevent sticking at the bottom.
Once boiling, drop the heat right down to a gentle simmer and leave the pan uncovered for 1.5 to 2 hours, stirring from time to time with a wooden spoon. The chutney is ready when the wooden spoon dragged across the base leaves a clear trail that does not immediately fill back with liquid. At that point, carefully ladle the hot chutney through a jam funnel into your warm sterilised jars, filling right to the top, and seal at once with vinegar-proof lids that have a plastic lining to protect against the acidity. Wipe each jar clean, then label with the name and date once fully cool. Store in a dark place and allow the flavours to mature for at least one month before opening — the wait genuinely transforms the taste.
Tips That Actually Make a Difference
The most common problem people run into with this Mary Berry green tomato chutney recipe is ending up with a runny result, and it almost always comes down to cooking time. If the chutney looks too loose, do not panic — simply continue to simmer it gently and watch as the liquid gradually reduces and the mixture thickens on its own. A heavy-based pan is genuinely important here because it distributes heat evenly and stops the bottom from scorching, especially in the later stages when things get thick and sticky. Make sure you stir regularly throughout, not just at the beginning — I have walked away from the pan too many times and come back to find the base catching, which is a frustrating and avoidable mistake.
On the flavour side, getting the sweetness right takes a little attention. If the taste feels too sharp, you can slightly reduce the amount of sugar next time, but be careful not to go too far — the sugar is there not just for sweetness but also to preserve the chutney and balance the acidity of the vinegar and tomatoes. The most important tip of all, though, is simply to let it mature. Give the flavours time to develop and mellow, and what starts as something quite sharp and punchy slowly becomes deeper, richer, and far more rounded in taste — a transformation that no amount of extra stirring can shortcut.
Mistakes I Made and What I Learned From Them
When I first made this Mary Berry green tomato chutney recipe, I made almost every beginner mistake in the book. The biggest one was ending up with a watery chutney that never quite set properly — and the fix turned out to be embarrassingly simple. I had not simmered it long enough with the lid off, which meant all that excess moisture had nowhere to go. Steam needs to escape freely for the chutney to reduce and thicken, and covering the pan even partially slows the whole process down significantly. The second issue was that my tomatoes stayed too firm in the final jar — they had not broken down the way they should have — and again the answer was straightforward: I had chopped them in pieces that were simply too large. Cutting them into smaller pieces next time solved it completely.
The other two problems I ran into were a sharp, harsh taste and a badly scorched base. The sharp flavour was purely a patience issue — I had not given the chutney enough maturing time and opened a jar far too early before the vinegar had a chance to mellow. As for the scorching, that came down to sticking at the bottom of the pan because I had the heat too high and had not stirred frequently enough toward the end when the mixture was at its thickest. Lowering the heat and staying close to the pan in those final stages fixed it every time after that.
A Lighter Take on This Classic Chutney
If you love this Mary Berry green tomato chutney recipe but want to make it a little better for everyday eating, a few small swaps go a surprisingly long way. The first thing I experimented with was switching to reduced sugar in the recipe, and rather than just cutting the quantity, I replaced it entirely with coconut sugar, which has a lower glycaemic index and brings a subtle caramel depth that actually works beautifully with the tomatoes. To compensate for the lost sweetness, I increased the amount of apples in the mix, letting their natural sweetness do the heavy lifting instead. It is a simple adjustment that keeps the chutney tasting full and rounded without relying on refined sugar to get there.
On the liquid side, swapping out malt vinegar for cider vinegar makes a noticeable difference — it is softer on the palate and brings a gentler flavor that lets the fruit and spice notes come through more clearly. I also started adding grated carrots to the pot, which was something I stumbled onto by accident one afternoon when I had a surplus in the fridge. They dissolve quietly into the chutney during the long simmer, adding extra nutrients without changing the taste or texture in any obvious way. It is one of those additions that makes you feel good about every spoonful without anyone at the table ever knowing it is there.
Simple Swaps That Still Work Beautifully
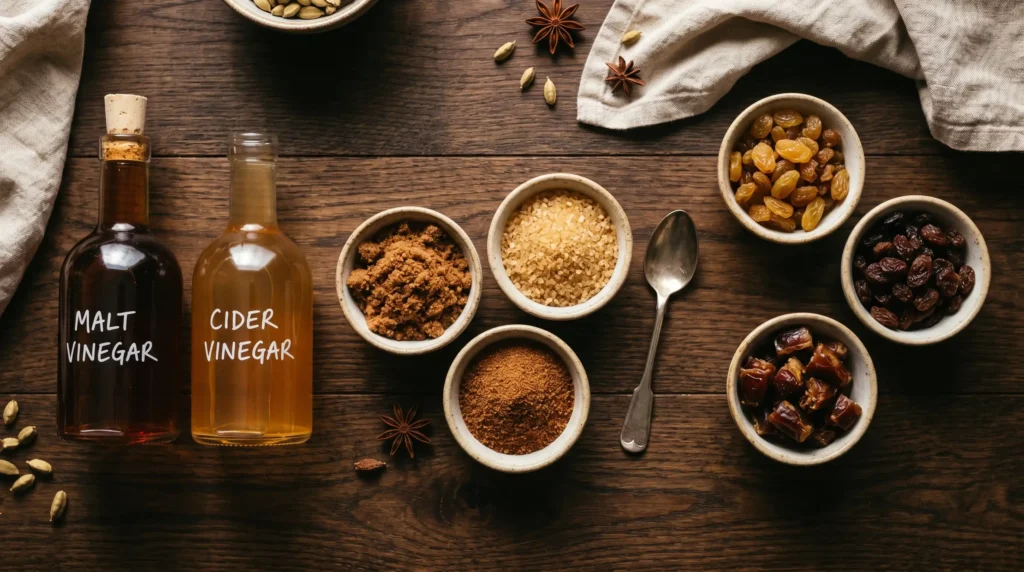
One of the things I appreciate most about this Mary Berry green tomato chutney recipe is how forgiving it is when you need to work with what you already have in the cupboard. The sugar, for instance, is very easy to swap around — brown sugar is the standard choice, but demerara gives a slightly more complex, toffee-like depth, while coconut sugar works well if you are looking for a less refined option. Each one brings its own subtle character to the finished chutney without throwing the overall sweeter profile off balance. On the vinegar side, malt vinegar is traditional and gives that classic sharp tang, but apple cider vinegar is a softer, fruitier alternative that I actually prefer in summer batches, and white wine vinegar works too if you want something a little more delicate and mild in the background.
Swapping the apples for pears is another change worth trying if you want a noticeably sweeter profile with a softer, more subtle fruitiness running through the chutney. I tried it once on a whim and was genuinely surprised by how well it worked alongside the tomatoes. For the spice blend, nutmeg adds a warm, almost woody note that pairs really nicely with the fruit, cinnamon brings that familiar cosy depth, and mixed spice is a brilliant all-in-one option if you want to keep things simple without measuring out individual spices. Any of these combinations will get you to a chutney that tastes considered and well-made.
Smart Swaps That Keep the Flavour Intact
When it comes to this Mary Berry green tomato chutney recipe, knowing your substitutions gives you real freedom in the kitchen — and I have tried most of these myself over the years with great results. If you do not have malt vinegar to hand, cider vinegar is the most natural replacement and actually brings a slightly fruitier tang that works surprisingly well with the tomatoes and apples. On the sugar side, demerara sugar is a fantastic swap that adds a gentle molasses warmth, while soft light brown sugar is the go-to if you want a milder, more straightforward sweetness that stays quietly in the background without overpowering the spices.
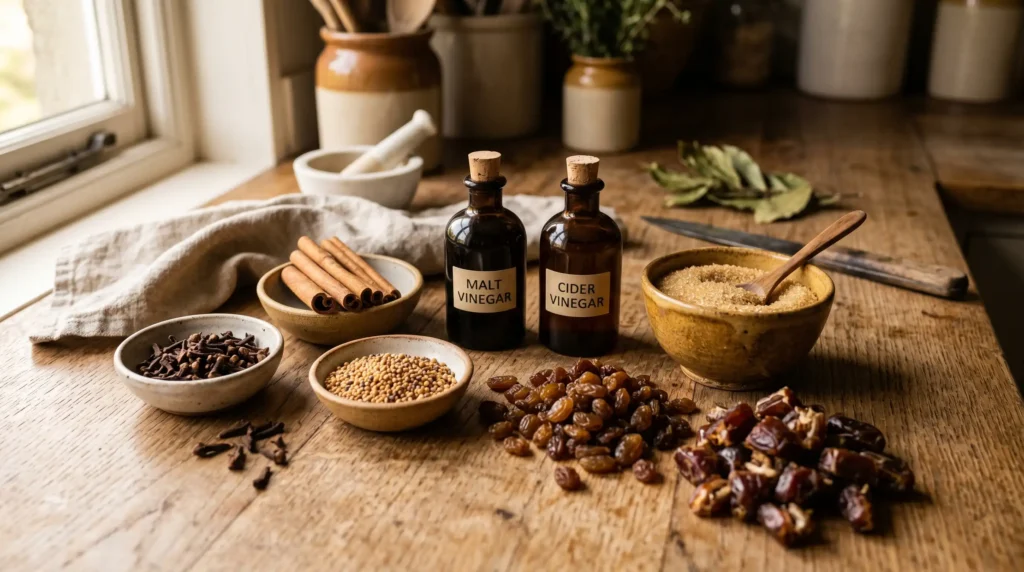
For the dried fruit, the choice between sultanas, raisins, and chopped dates is mostly down to personal preference — sultanas keep things light and familiar, raisins add a slightly deeper, jammier note, and chopped dates bring a rich, almost caramel-like body that I personally love in autumn batches. If you enjoy cooking with whole spices for a more fragrant result, try dropping in a cinnamon stick or a few cloves during the simmer — just remember to remove them carefully before potting the chutney into jars, as leaving them in can make the flavour increasingly intense over time and occasionally overwhelming once the chutney has matured.
Ways to Serve This Chutney That Actually Excite
This Mary Berry green tomato chutney recipe is one of those rare condiments that genuinely makes everything it touches taste better, and I say that from years of reaching for a jar at almost every meal. The most natural home for it is on cheese boards — particularly alongside a wedge of strong cheddar or a slice of crumbly Lancashire cheese, where the sweet-tangy contrast is absolutely spot on. It is the soul of a proper Ploughman’s lunch, sitting perfectly next to cold ham, pork pies, and thick slices of crusty bread or a good baguette. I have also spread it generously into a cheese sandwich or a ham sandwich and been amazed at how much instant flavor it adds with absolutely no extra effort — it is the kind of thing that quietly elevates a simple lunch into something worth sitting down for.
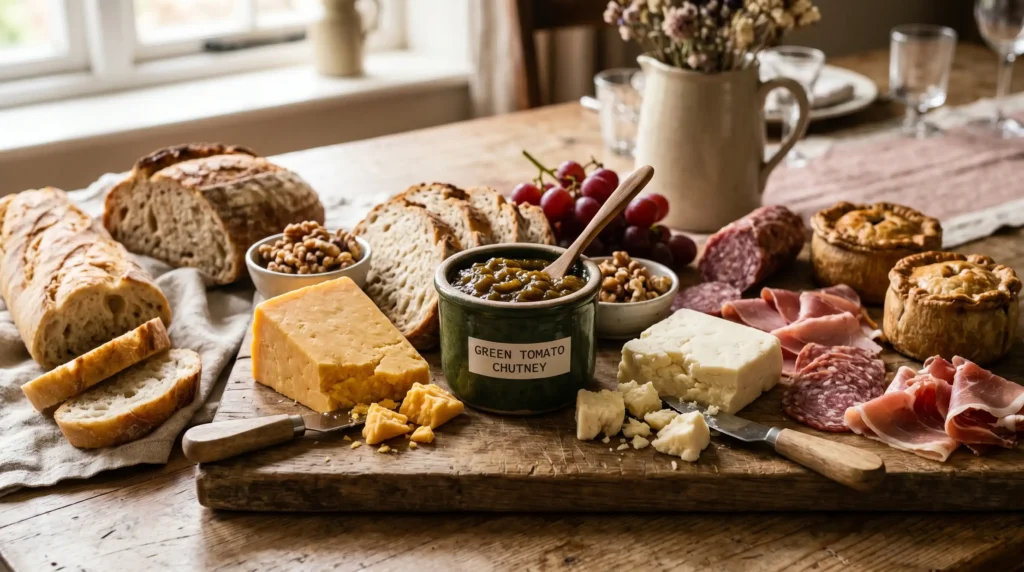
Beyond the classic British combinations, this chutney has a tangy versatility that works well in more unexpected places too. A spoonful on charcuterie boards adds brightness and depth that cuts through rich cured meats beautifully, and it works just as well alongside cold meats like cold roast beef or roast chicken at the dinner table. I started adding it to burgers and wraps a couple of summers ago as a tangy twist on the usual sauces, and it has never left the rotation since. Even toasties and ploughman’s lunches feel more considered with a generous spoonful tucked in — it is the kind of companion and flavour boost that makes you wonder how you ever managed without it.
The Best Things to Eat Alongside This Chutney
This Mary Berry green tomato chutney recipe has a natural sharpness and body that makes it a genuinely brilliant partner for rich, savoury foods — and once you start pairing it properly, it is hard to go back to plain condiments. The most rewarding match I have found is a good strong cheddar, where the sweet-tangy contrast between the aged cheese and the spiced chutney is nothing short of perfect. It brings the same brightness and depth to charcuterie boards — cutting through cured meats and adding a layer of flavour that makes the whole spread feel more considered and complete. A thick slice of crusty bread or a fresh baguette alongside a generous spoonful of this chutney is, honestly, one of the most satisfying classic British combinations I know.
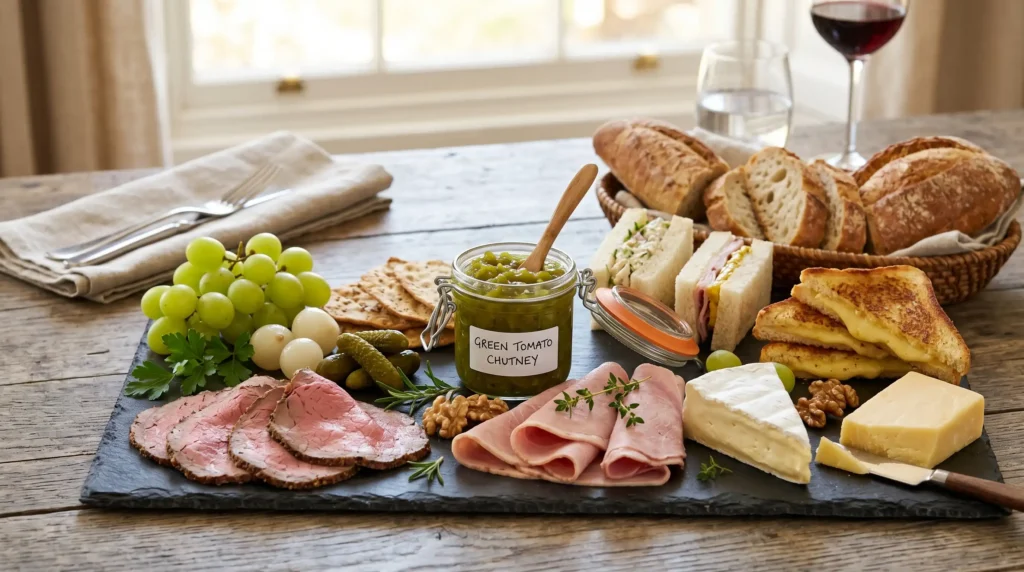
For everyday eating, this chutney is just as useful as it is impressive at the table. Layered into sandwiches or toasties, it delivers instant flavor without needing anything else — I often use it in place of mustard or pickle and find it works even better. It is also a natural companion to cold roast beef or ham on a plate, where its acidity lifts the richness of the meat in exactly the right way. Whether you are building a casual lunch or putting together something a little more generous for guests, this chutney quietly does more than its fair share of the work.
Expert Tips for Getting This Chutney Just Right
The single most important thing I have learned from making this Mary Berry green tomato chutney recipe repeatedly is that patience with heat makes all the difference. Always simmer on low and slow — rushing the cooking by cranking up the heat might seem like a time-saver, but it leads to burning at the base and an uneven texture that no amount of stirring can fully rescue. A heavy-bottomed pan is not optional here; it is the one piece of equipment that genuinely protects the chutney during those long cooking hours and allows the tomatoes to break down smoothly and evenly without catching. This steady, unhurried approach is what builds that remarkable depth of flavor that makes a really good chutney stand apart from an average one.
On the flavour balance side, keep tasting toward the end of cooking and pay attention to both sweetness and acidity — they need to sit in harmony, and small adjustments at the right moment make a real difference to the finished result. Once you are happy with the taste, make sure you properly sterilize jars before potting, because good long-term storage depends entirely on clean, prepared jars that won’t compromise the chutney over time. Seal the jars while the chutney is still hot and then set them aside — waiting at least 2 weeks before opening is genuinely worth it, because that resting time is what allows the full flavor to develop into something truly rounded and special.
Fun Ways to Make This Chutney Your Own
One of the quiet joys of making this Mary Berry green tomato chutney recipe at home is that once you understand the base, you can start playing with it in ways that genuinely surprise you. Adding dates to the pot is something I started doing a couple of batches ago, and the richness they bring is remarkable — they dissolve slowly into the mixture and give the chutney a deeper, almost jammy body that feels more indulgent than the standard version. Golden raisins are another addition worth trying; they are softer and lighter than regular sultanas and add a delicate sweetness that sits beautifully alongside the sharp tomatoes without tipping the balance too far in either direction. If you enjoy a bit of heat, a good pinch of chilli brings a gentle spicy kick that creeps in at the end of each mouthful and makes the chutney feel far more alive and interesting.
On the aromatic side, swapping out or supplementing lemon with orange zest is a small change that delivers a noticeably warmer flavor — it rounds off the sharpness of the vinegar and gives the whole chutney a slightly more festive, winter-ready character that I love in jars made for gifting. Mustard seeds are another personal favourite addition of mine — they stay whole through the cooking process and add little bursts of texture and spice that make each spoonful feel more considered and handcrafted. These kinds of small, thoughtful tweaks are what turn a reliable recipe into something that feels entirely your own.
How to Store This Chutney Properly
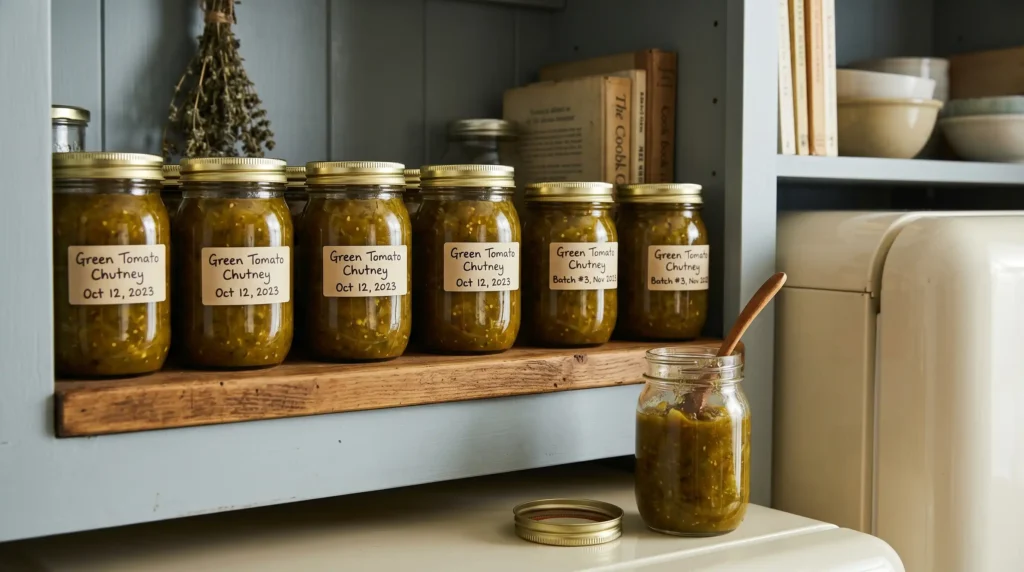
One of the genuinely satisfying things about this Mary Berry green tomato chutney recipe is how well it keeps once it is made and potted correctly. At room temperature, unopened jars will sit happily in a cool, dark cupboard for up to 1 year — and in my experience, the flavour only improves the longer you leave them alone. I have opened jars at the three-month mark and at the nine-month mark, and the difference is noticeable every time. The key is making sure the jars are properly sealed and stored away from direct light and heat, both of which can affect the colour and taste of the chutney over time even in a preserved state.
Once a jar has been opened, move it straight to the fridge and use it within 4 weeks — though in most households it disappears long before that. It is worth noting that freezing this chutney is not something I would recommend, despite it being a tempting option when you have a large batch on your hands. Freezing affects the texture in a way that is hard to reverse — the consistency becomes looser and slightly grainy once thawed, which takes away from that thick, spoonable quality that makes the chutney so satisfying to use. Keeping it in properly sealed jars at the right conditions is always the better choice.
Storing This Chutney the Right Way
Proper storage is what makes this Mary Berry green tomato chutney recipe truly worth the effort — and the good news is that it keeps exceptionally well when handled correctly. Unopened jars can be stored in a cool dark place for anywhere between 6–12 months, and the flavour genuinely improves with age, becoming more rounded and mellow the longer it sits undisturbed. I always make a large batch specifically because I know the jars I open last will taste noticeably better than the ones I open first. Keep them well away from sunlight at all stages, as even indirect light exposure over time can gradually affect both the color and taste of the chutney in ways that are hard to reverse.
Once opened, the rules change — transfer the jar straight to the refrigerator and treat it as you would any fresh preserve from that point on. Opened jars are best used within 6 weeks, though in practice most people find they get through a jar well within that window. For longer-term keeping before opening, sealed jars stored in a cool dark cupboard will last a full 1 year with no loss of quality. Allow 4-6 weeks before tasting for the best results, as freshly made chutney needs that resting time to mature fully. This chutney is never reheated — it is always served cold or at room temperature, which is exactly how it tastes its best.
Reheating and Mary’s Secrets to Getting It Right
This Mary Berry green tomato chutney recipe is almost always served cold or at room temperature straight from the jar, and that is genuinely how it tastes best — no warming needed in most situations. However, if you ever find yourself wanting to serve it slightly warm alongside a hot dish, the stovetop is the most reliable method — just heat it gently for 2–3 minutes over a low flame, stirring as it warms through. The microwave works too for a quicker option; 10–15 seconds is usually enough. If the chutney looks too thick after sitting in the fridge, simply add a small splash of water to thin it out slightly before heating — it comes back together easily without losing its character.
When it comes to making the chutney itself with real confidence, Mary’s own approach holds a few quietly brilliant secrets worth knowing. The first is to always choose a wide preserving pan over a tall stockpot — the greater surface area allows the liquid to evaporate far more efficiently, which cuts down your cooking time considerably and gives you better results without standing over the stove for hours. Never be tempted to put a lid on during the simmer, as trapping the steam is the enemy of good thickening — the whole point is to let moisture escape freely. And finally, be patient and allow the chutney to fully mature before opening — the flavour transformation that happens in those weeks of resting is nothing short of remarkable.
Frequently Asked Questions About This Chutney
How do I know when the chutney is ready?
The most reliable way is the wooden spoon test — drag it across the bottom of the pan and if it leaves a clear channel or clear line that does not immediately flood back with liquid, the consistency is right. Keep in mind that the chutney will continue to thicken slightly as it cools in the jar, so do not over-reduce it on the stove.
What do I do if my chutney is too runny?
If your chutney turns out runny, continue to simmer it uncovered and allow the excess liquid to evaporate, stirring regularly so nothing catches on the base. Extra cooking time with the pan open is all it needs.
Why does my chutney taste so sharp and vinegary?
The vinegary taste straight from the pot is completely normal. That sharp vinegar edge mellows beautifully once given time to mature — allow at least 2 weeks, though a full month is even better. During that resting time, the fruit, spice, and deeper flavours all meld into something far more rounded and harmonious. Patience is genuinely the most important ingredient at this stage.
How do I sterilise my jars properly?
Wash them in hot soapy water, rinse thoroughly, and place them on a baking tray in an oven set to 140°C or 120°C Fan for at least 15 minutes. Always ladle your hot chutney into hot jars — pouring hot liquid into cold glass risks cracking and ruins the seal entirely.
Can I use red tomatoes instead of green tomatoes?
It is not recommended. Ripe tomatoes have a much higher water content and a softer texture, which leads to a mushier, looser chutney that lacks the firm texture and tart flavour that make this recipe so distinctive. Green tomatoes and their natural firmness are what give this chutney its character — ripe tomatoes simply produce something sweeter and softer that behaves differently throughout the cook.
Can I reduce or omit the spices?
Yes, you can freely reduce or omit certain spices to suit your taste. The chutney remains deeply flavorful and well-balanced even with a lighter spice hand, as long as the core ingredients stay intact and the mixture has been properly thickened and the spoon dragged across the pan leaves a clear line before potting.
What’s Actually in Each Serving of This Chutney
One thing people rarely think to check with a homemade preserve is the nutritional side — and with this Mary Berry green tomato chutney recipe, the numbers are actually quite reasonable for something that tastes this good. Per serving, the calories sit at around 110 to 120 kcal depending on the exact ingredients you use, with carbohydrates coming in at approximately 27g to 28g — most of which comes from the natural fruit content and added sugar. The sugar itself accounts for around 22g per serving, which is worth keeping in mind if you are watching your intake, though a typical spoonful of chutney is small enough that it rarely adds up to a concern in everyday eating. Protein is minimal at just 1g, and fat is almost negligible — sitting at 0g to 0.2g — making this a virtually fat-free serving with saturated fat at 0g across the board.
On the mineral side, sodium ranges from 70mg to 180mg per serving depending on how much salt you add during cooking, and fiber comes in at a modest 2g which reflects the vegetable and fruit content in the base. These are all estimates, of course — the actual values will naturally vary based on the specific ingredients and quantities you choose, particularly your choice of sugar, carbs-heavy additions like sultanas, and the amount of sodium added through salt and vinegar. I always treat these figures as a helpful guide rather than a fixed rule, especially when making substitutions or scaling the batch up or down.


for something more substantial, roasted chicken or grilled meat alongside turns this into a full, satisfying dinner spread that works well for both family meals and entertaining,
Creamy mashed potatoes are the most natural partner for this casserole the rich sauce and tomato gravy pool into the mash in the most satisfying way, and together they make a genuinely complete dinner. Crusty bread or a torn baguette used as dipping bread is the more relaxed option and honestly just as good on the right evening. Steamed rice either buttered rice or plain long-grain rice also works well if you want something lighter under the casserole.