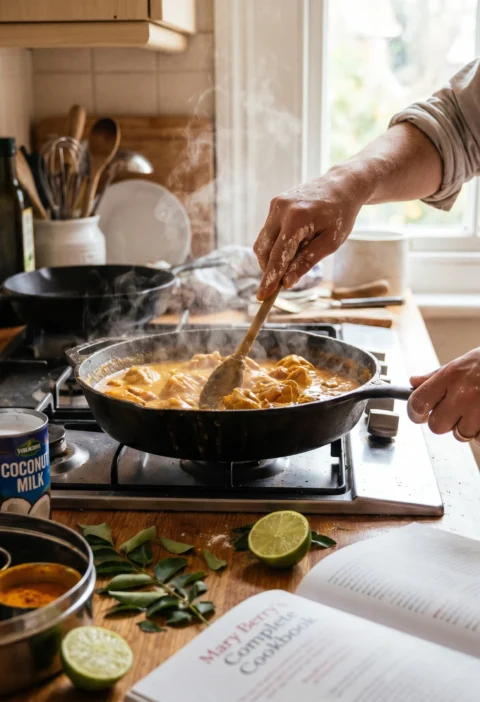
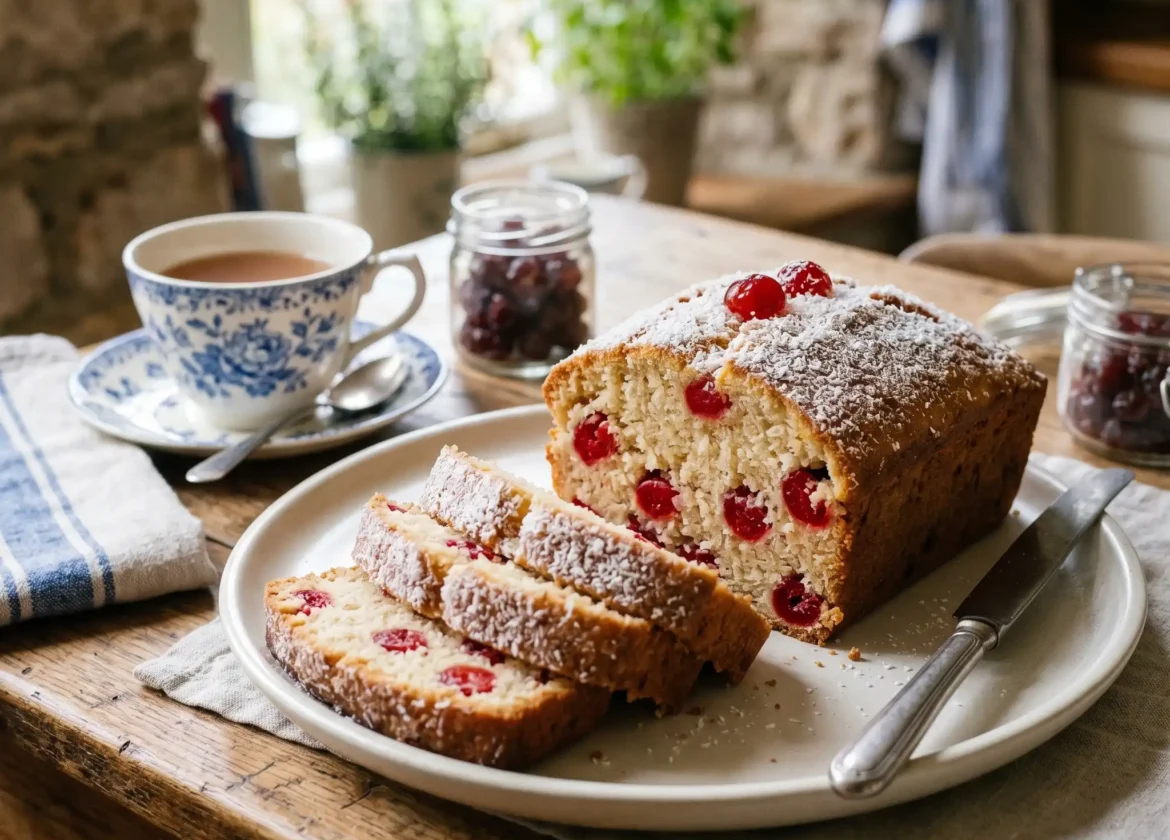
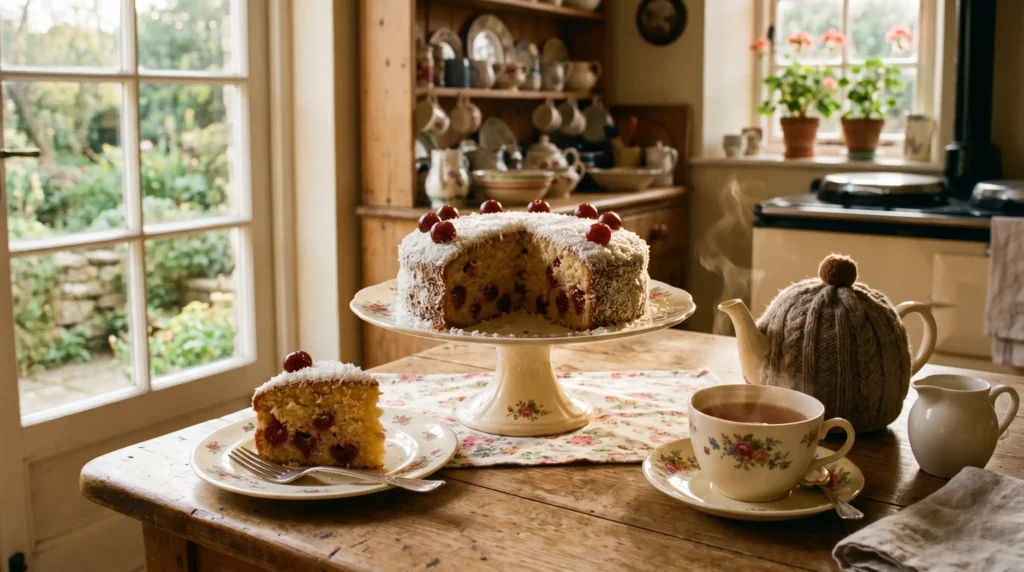
There is something wonderfully nostalgic about a classic British bake that has stood the test of time, and this Mary Berry cherry and coconut cake recipe is exactly that. I still remember the first time I made it on a quiet Saturday afternoon the kitchen filled with the rich coconut flavour and the sweet smell of glacé cherries bubbling gently in the oven. This soft, buttery sponge is packed with juicy, studded cherries and carries a gentle chew from the desiccated coconut that makes every single slice feel like a little reward. What I love most is the perfect balance between fruity sweetness and that light, moist texture — each bite delivers a flavorful combination that never feels too heavy or too plain. Whether you are baking for afternoon tea, birthdays, or simply enjoying some weekend baking, this recipe fits every occasion beautifully.
What makes this recipe so loved by both beginners and experienced home bakers is how effortlessly it comes together. The loaf-style bake follows easy steps that take just around 1 hour 30 minutes from mixing to finish, making it one of the most reliable and simple bakes you can prepare at home. I always tell people who are new to baking follow a few smart tips, trust the process, and the results will speak for themselves. Inspired by the timeless work of Mary Berry, this classic cake pairs perfectly with a warm cup of tea and brings a sense of comfort that only a well-made, simple, flavorful homemade bake can deliver.
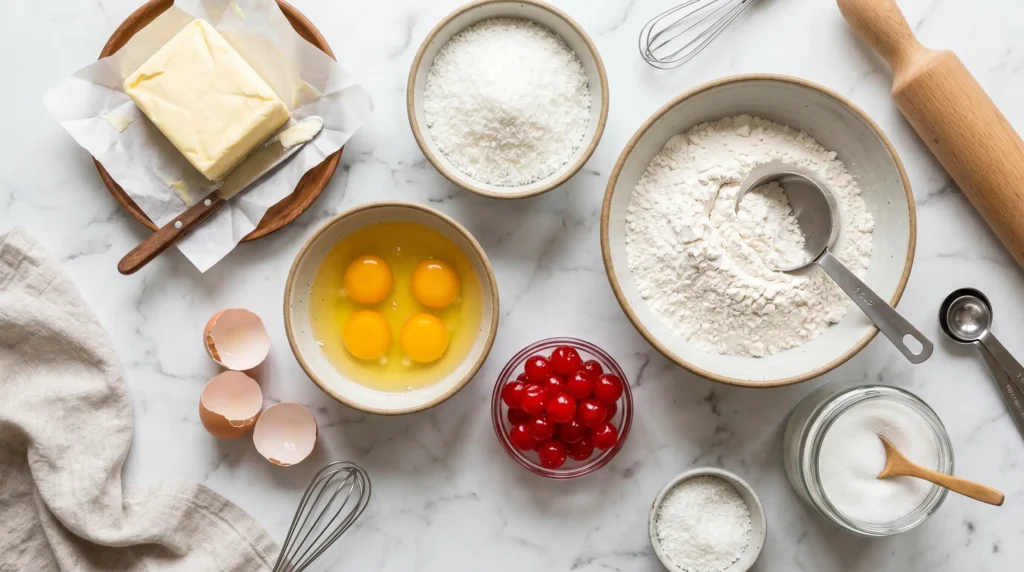
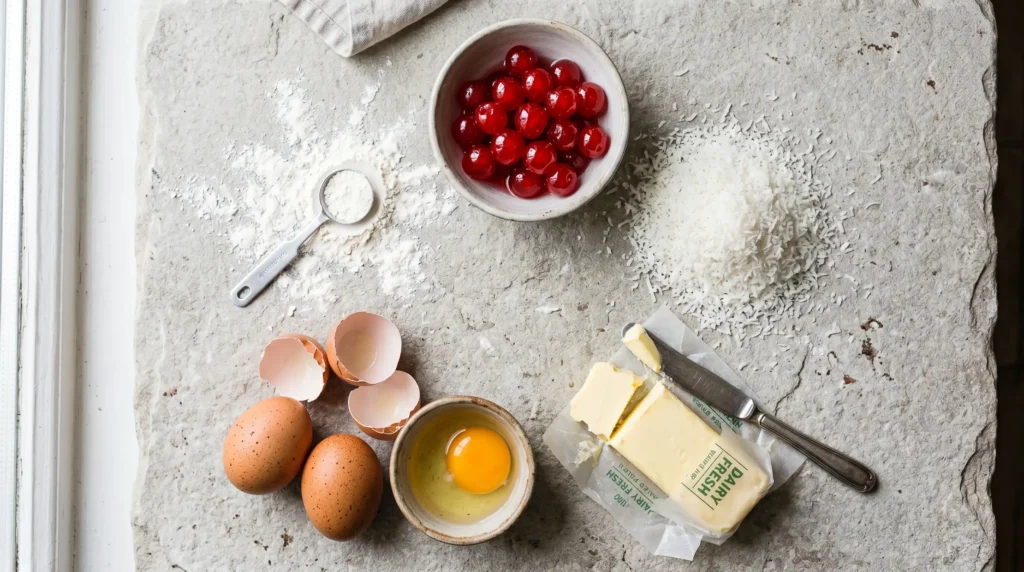
What Goes Into This Cake
| Ingredient | Amount |
| unsalted butter | 225g / 8 oz |
| baking spread | 175g / 6 oz |
| caster sugar | 225g |
| large eggs | 4 |
| self-raising flour | 225g / 8 oz |
| baking powder | 1 tsp / 1 level teaspoon |
| desiccated coconut | 100g / 3 oz |
| glacé cherries | 150g / 7 oz |
| plain flour | 2 tbsp |
| milk | 2 tbsp / 3 tablespoons |
| vanilla extract | 1 tsp |
| icing sugar | for dusting |
How to Make Mary Berry Cherry and Coconut Cake Recipe
Before anything goes into a bowl, setting up your oven and tin properly makes a real difference to how this Mary Berry cherry and coconut cake recipe turns out. I always preheat the oven to 180°C / 160°C Fan / Gas 3 or 320°F if you are working in Fahrenheit though some versions run slightly hotter at 350°F / 140°C Fan depending on your oven’s personality. For a classic round shape, grease and line a 20cm cake tin with baking parchment, pressing it firmly into the base and up the sides so nothing sticks. If you prefer a loaf-style bake, a 2lb / 900g loaf tin lined with baking paper works just as well the loaf lifts out cleanly every time when lined properly, which I learned the hard way after losing half a cake to an unlined tin years ago.
Next comes the step most people rush through but really should not prepping the glacé cherries. Start by cutting them into halved or quarter pieces, then place them in a sieve and rinse thoroughly under cold water or warm water to remove that sticky syrup coating that clings to them. After rinsing, pat them completely dry with kitchen paper any leftover moisture will cause sinking during baking. Once dry, toss them in 1 tablespoon of measured plain flour and coat evenly this simple trick keeps them suspended beautifully throughout the batter rather than dropping straight to the bottom.
Mixing the Batter the Right Way
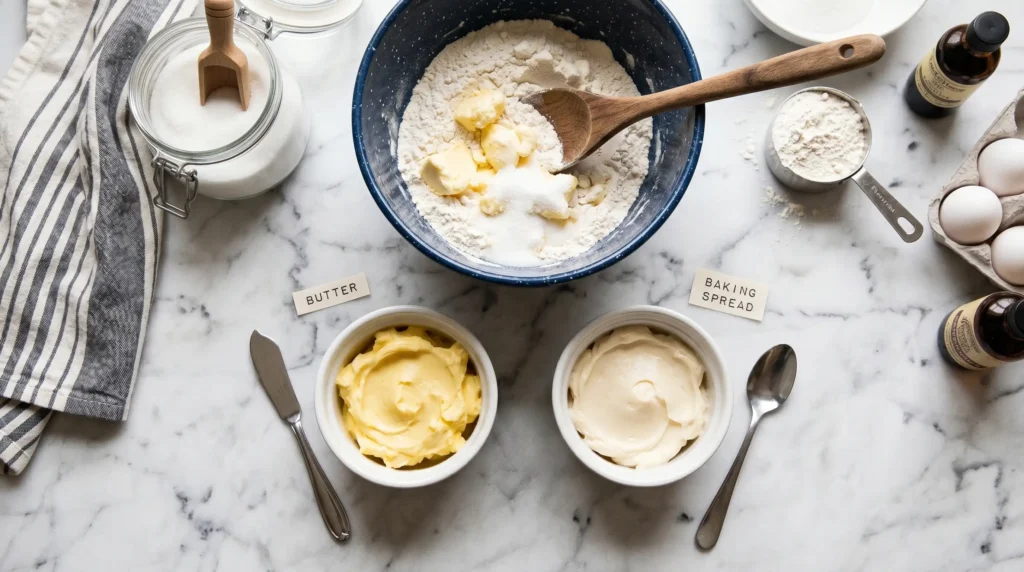
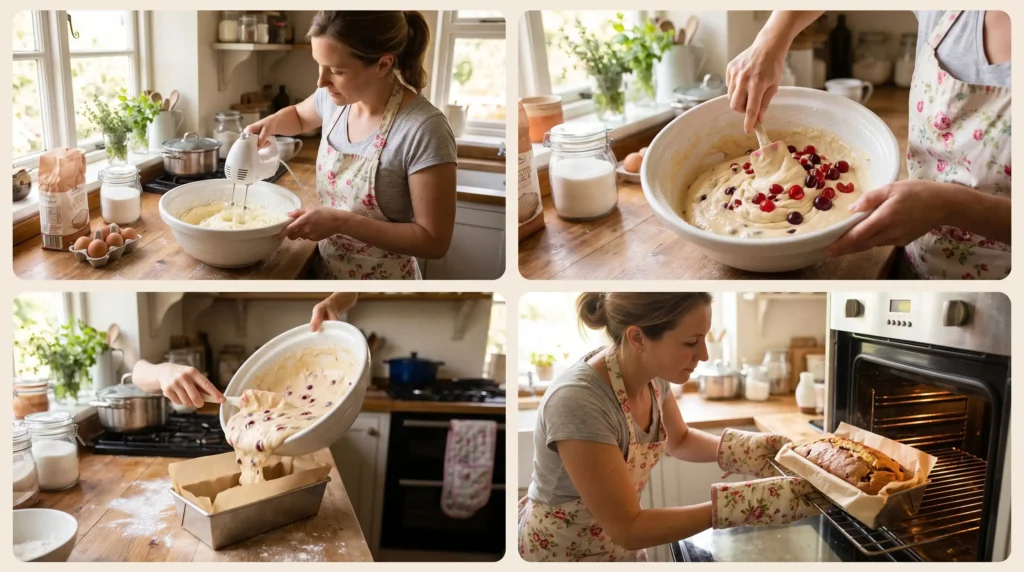
Once your cherries are prepped and your tin is ready, making the batter for this Mary Berry cherry and coconut cake recipe is where everything starts coming together beautifully. Grab a large mixing bowl and add the remaining flour, baking powder, butter or baking spread, sugar, eggs, and milk all at once yes, everything goes in together, and that is exactly what makes this recipe so refreshingly easy. Using an electric mixer, beat everything for just 1–2 minutes until the mixture turns smooth, pale, and creamy, with all ingredients fully combined. I remember the first time I made this, I was nervous about the all-in-one method, but those 1–2 minutes of steady mixing genuinely transform a rough, shaggy mix into something that looks and smells absolutely wonderful.
What you are aiming for is a batter that falls slowly off the spatula not too stiff, not too runny. If you feel the mixture looks a little thick after everything is combined in the large bowl, a tiny extra splash of milk loosens it up just right. The key here is to not over-beat once everything looks smooth and creamy the moment it comes together as a pale, uniform mixture, stop the electric mixer and move on. Over-mixing at this stage develops too much gluten in the remaining flour and can make the final bake tighter than you want, which is something I only figured out after a couple of denser-than-expected results early on.
Folding In the Cherries and Coconut
This is the step in the Mary Berry cherry and coconut cake recipe where you need to slow down and be a little careful and honestly, it makes all the difference. Sprinkle the desiccated coconut evenly over the batter first, then add the flour-coated cherries on top. Using a metal spoon or spatula, fold everything in gently with slow, sweeping movements from the bottom of the bowl upward. The goal is to distribute the fruit evenly without knocking the air out of the batter you just worked to build up.
The most important thing here is to avoid crushing the fruit as you work through the batter. I always use a spatula rather than a whisk or electric mixer at this stage because the light, flexible edge lets you fold gently without breaking the flour-coated cherries apart. A metal spoon works just as well if that is what you have — the key is patience and a light hand. Once the desiccated coconut and fruit are evenly distributed with no dry pockets visible, you are ready to move on to the tin.
Getting the Bake Just Right
Once the batter is ready, transfer the cake mixture carefully into your lined loaf tin and use a spatula to smooth the top into an even, flat surface this small step helps the cake rise uniformly rather than cracking unevenly in the oven. Now it is time to bake, and the timing here depends on which tin you used. A round cake tin typically needs around 35 to 40 minutes, or 40 to 45 minutes at a slightly lower temperature, while a loaf tin version runs longer anywhere from 1 hour 15 minutes to 1 hour 20 minutes, and sometimes up to 75–80 minutes depending on your oven. I always set my timer a few minutes early on the first bake with any new oven because every oven runs a little differently, and catching it at the right moment makes a real difference to the final texture.
The best way to check if this Mary Berry cherry and coconut cake recipe is fully baked is to look for a deep golden brown colour on top that rich, golden crust is a good visual signal that the inside is nearly done. Then insert a skewer straight into the centre of the cake and pull it out slowly if it comes out clean and firm with no wet batter clinging to it, the cake is ready. If there is any stickiness, give it another five minutes and test again. I have learned never to skip the skewer test no matter how golden the top looks, because the centre can still be under baked even when the surface looks perfect.
Cooling and Serving the Cake
Once the Mary Berry cherry and coconut cake recipe comes out of the oven, patience becomes your best tool. Leave the loaf sitting in the tin for exactly 10 minutes not less, not more before you attempt to move it. This short rest allows the structure to firm up just enough so the cake holds its shape when you lift it out. Then carefully transfer it onto a wire rack and let it cool fully before slicing. I made the mistake of cutting into a warm loaf once and the whole thing crumbled apart, so trust me letting it cool completely on the wire rack is absolutely worth the wait.
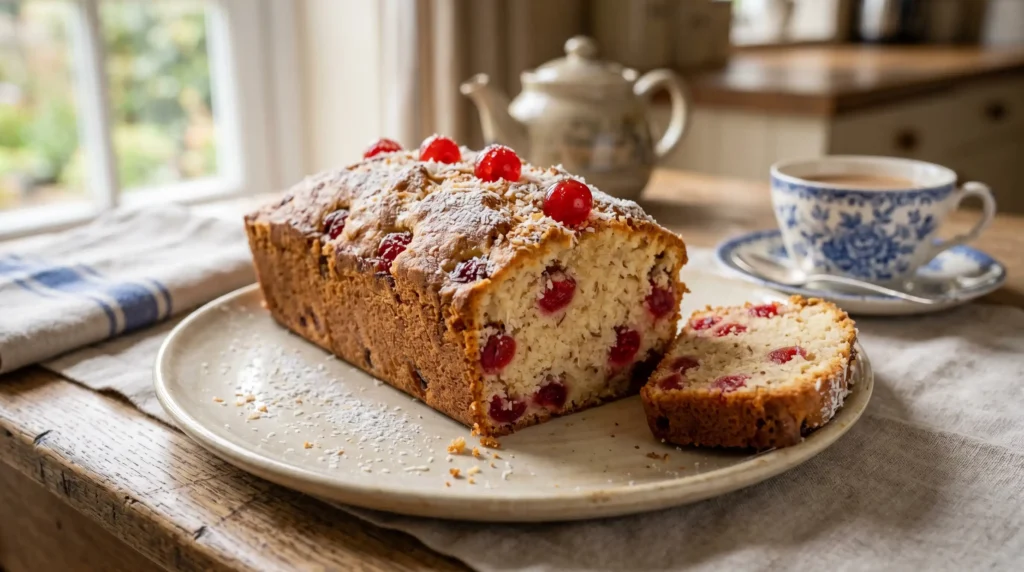
When the cake has cooled down completely, the finishing step is beautifully simple. Lightly dust the surface with icing sugar just before serving I usually do this right at the last moment so the icing sugar stays crisp and white rather than dissolving into the crust. That gentle dusting transforms the look of the cake instantly, giving it a clean, elegant finish that feels far more special than the effort it actually takes. Then go ahead and start slicing each piece should be firm, moist, and ready to enjoy.
Tips That Actually Make a Difference
The small details in this Mary Berry cherry and coconut cake recipe are what separate a good bake from a great one, and most of them come down to how you handle the cherries. Always rinse your glacé cherries thoroughly to strip away that sticky syrup coating if you skip removing it, the fruit will simply slide straight to the bottom during baking. After rinsing, pat dry them completely with kitchen paper because any excess moisture left on the surface transfers directly into the sponge and throws off the whole texture. Once dry, coat them lightly in flour before folding into the batter this is the trick that keeps them evenly distributed and suspended throughout rather than sinking. If you are using fresh cherries, make sure to remove the stones first and pat dry thoroughly, as they carry far more natural moisture than glacé cherries and can make the batter heavier than intended.
Equally important is how you manage the oven and your mixing technique. Always bring your ingredients to room temperature before starting cold butter and cold eggs do not combine well and result in a dense, uneven sponge rather than the soft, balanced, lighter crumb you are aiming for. Avoid overmixing once the flour goes in, as working the batter too hard develops gluten and kills the texture you worked to build. Keep a steady oven temperature throughout so the cake can rise evenly without collapsing in the middle. To prevent overbaking and dryness, always check doneness a few minutes before the suggested baking time ends ovens vary, and catching it early is always better than pulling out a dry, overdone cake.
Choosing Coconut and Preventing Over-Browning
The type of coconut you use in this Mary Berry cherry and coconut cake recipe genuinely affects the final result more than most people expect. Always go for unsweetened desiccated coconut it blends smoothly into the batter and adds that signature delicate chew that makes every slice so satisfying. I made the mistake of using flaked coconut once thinking it would add more character, but the larger pieces disrupted the texture completely and made the crumb feel uneven and slightly stringy rather than soft and consistent. Desiccated coconut is finer, more uniform, and simply works better here in every way.
Another thing worth watching closely is how the loaf bakes during the longer stretch in the oven. Around the 50-minute mark, take a quick peek and check whether the top darkens too quickly if it does, simply cover it loosely with a sheet of foil and let it continue baking underneath. This stops the surface from burning while the centre finishes cooking through properly. I always keep a piece of foil nearby when baking this recipe because the sugar in the batter can catch faster than you expect, and a quick loosely placed cover at the right moment saves the whole loaf without any fuss.
Butter or Baking Spread — Which One Actually Works Better?
When I first tried Mary Berry’s cherry and coconut cake, I made the mistake of reaching straight for butter without a second thought. The result was decent, but something felt slightly dense. That’s when I started paying closer attention to what baking spread actually does differently. Products like Stork have been a quiet staple in British baking for decades, and honestly, they earn their place. Because they’re already softer straight from the fridge, they blend into your batter far more smoothly than cold butter ever could, giving your cakes a noticeably lighter feel right from the start.
What really changed my approach was discovering the all-in-one method where everything goes into the bowl at once. This technique works beautifully with baking spread because its consistency supports quick, even mixing without overworking the batter. The trade-off, however, is flavour. Butter brings a deeper, more rich taste that baking spread simply can’t match. For this particular cake, where cherries and coconut are already carrying bold flavour, baking spread handles the texture side of things gracefully. My honest recommendation? Use baking spread for a reliably soft crumb, but if flavour depth matters most to you, a good quality butter will never let you down.
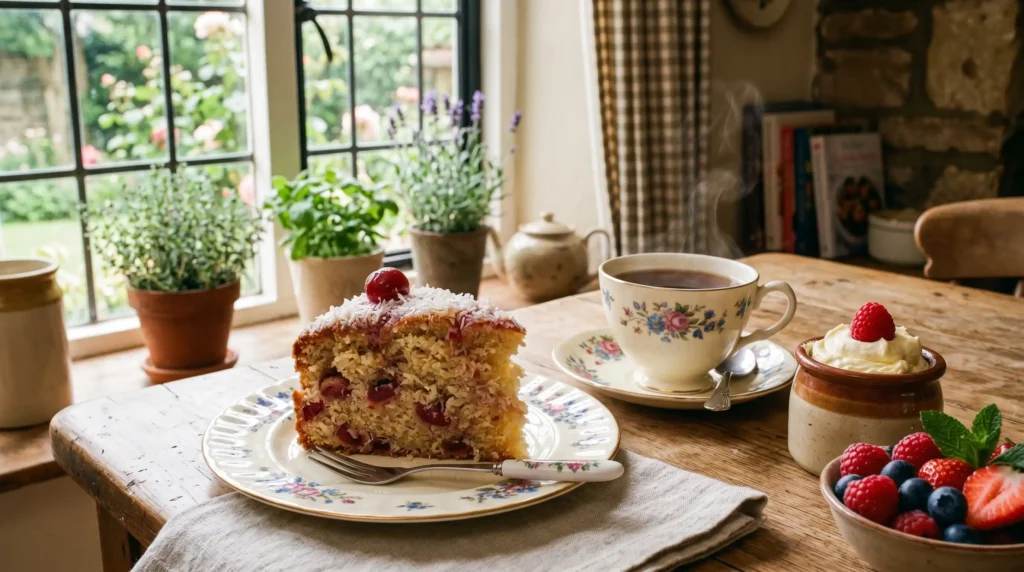
What Goes Best on the Side When You Serve This Cake
There is something about serving this cake slightly warm from the oven that feels almost old-fashioned in the best possible way the kind of favourite that never goes out of style. At casual gatherings, I love placing it at the centre of the table with a pot of English Breakfast tea or freshly brewed coffee nearby. The warm, familiar bitterness of both drinks cuts right through the sweetness of the coconut and cherry, balancing every bite beautifully. For something a little more playful, especially in summer, a glass of pink lemonade works surprisingly well and turns this simple dessert into something that feels almost festive. A light dusting of icing sugar over the top gives it a clean, pretty finish without any extra effort.
When it comes to pure indulgence, though, this cake really earns its place as a proper pudding. A generous scoop of vanilla custard poured over a warm slice is in my experience one of those combinations that just makes sense. Clotted cream works equally well if you want to lean into that classic British feel, and whipped cream keeps things lighter for those who prefer it. I’ve also served it at room temperature alongside fresh berries for a slightly sharper contrast that stops the sweetness from becoming too heavy. If you’re feeling generous, a small jug of warm custard on the side lets guests help themselves and makes the whole thing feel far more like a proper sit-down treat than just a slice of cake.
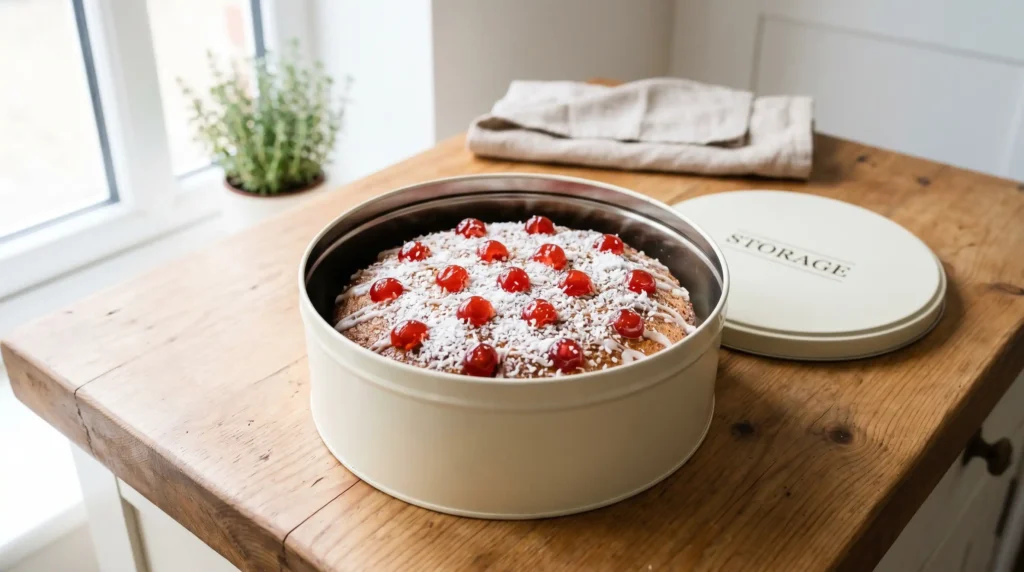
Keeping It Fresh — Room Temperature Storage
One thing I have learned from baking this cake more times than I can count is that proper storage makes a genuine difference to how it tastes the next day. At room temperature, this cake holds up remarkably well simply place it in an airtight container or an airtight tin and keep it somewhere in a cool kitchen away from direct sunlight or heat. The cherries and coconut actually work in your favour here because the natural moisture locked inside the fruit and coconut keeps the crumb from drying out too quickly. Done right, the cake stays soft and enjoyable for a good couple of days without any special effort on your part.
What surprises most people is just how well this cake lasts beyond that initial window. Stored correctly in that same airtight tin, it can comfortably sit at room temperature for up to 3 days and still taste every bit as good as it did fresh. I have personally pushed it to 5 days before keeping the tin sealed and the kitchen cool and the texture remained far better than expected, largely thanks to that natural moisture that the coconut and cherries continue to release slowly over time. The key is simply resisting the urge to leave it uncovered on the counter, which dries it out faster than anything else. Seal it well and this cake genuinely rewards a little patience.
Does This Cake Actually Need the Fridge?
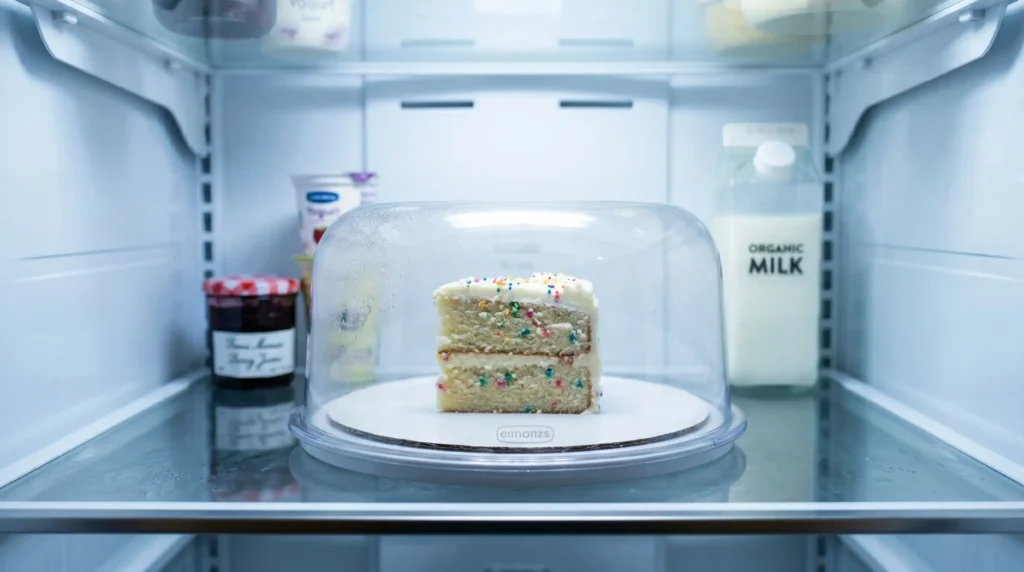
Honestly, refrigerating this cake is something I’d only recommend if your kitchen runs particularly warm or you need to stretch its freshness beyond the usual room temperature window. The fridge does preserve it well enough, but cold air has a way of firming up the crumb and dulling the coconut flavour so if you do go this route, always store it in a container to protect the texture from drying out further. The most important step before eating is to let your slices come fully back to room temperature first. That short wait makes a real difference and brings the softness back to where it should be. Skipping it means eating cake that feels stiffer than it actually is once refrigerated.
Freezing for Later Without Ruining the Cake
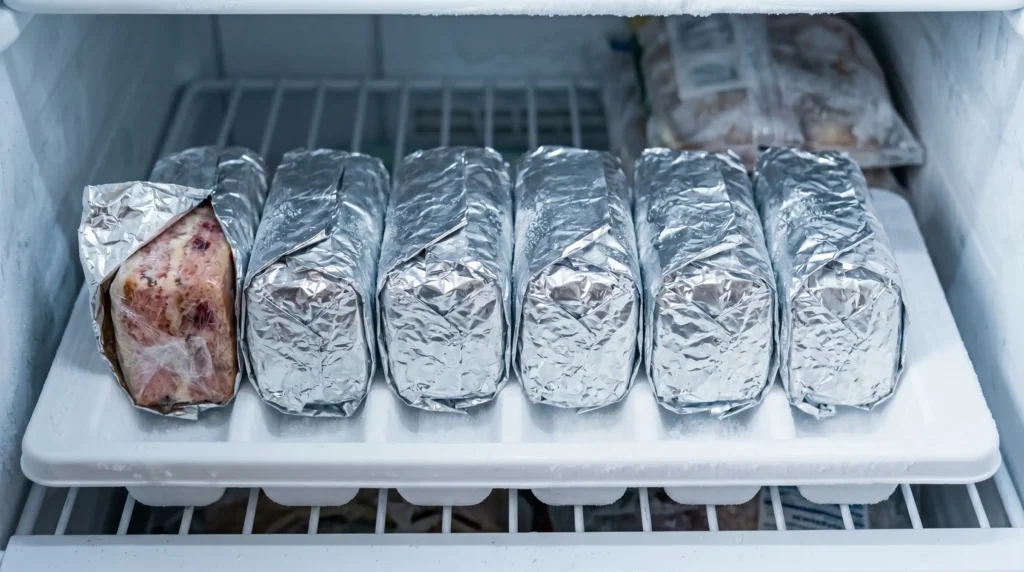
Freezing this cake is something I started doing after realising how well it holds up when wrapped properly. Whether you’re freezing the whole loaf or portioning it into individual slices, the method matters. Wrap each piece tightly in cling film first, then add a layer of greaseproof paper, and finish with foil on the outside that triple wrap locks out air and prevents freezer burn effectively. Once wrapped, you can freeze them confidently for up to 3 months with no real loss in texture or flavour. When it’s time to eat, simply defrost by moving slices to the fridge to thaw overnight, or leave them at room temperature for around 3–4 hours before serving.
A Closer Look at What’s Actually in Each Slice
This cake is a proper treat, and the numbers reflect that honestly. Based on estimated values using standard ingredients, the recipe yields around 10 servings, with each per slice count sitting at roughly 395 kcal at the higher end though depending on portion size, figures closer to 330 or even 285 calories are realistic too. The carbohydrates come in at around 42g per slice in a generous cut, dropping to 34g in a more modest one, while sugar accounts for a significant portion of that at 25g or 22g respectively. Protein sits at a modest 5g, which is about what you’d expect from a sponge-based bake where eggs and a little flour do most of the work in that department.
The fat content is where coconut makes its presence known 22g per slice in a larger portion, scaling down to 16g or 15g in smaller cuts. Of that, saturated fat runs between 9g and 13g depending on serving size, which again is largely down to the coconut and butter used in the bake. Unsaturated fat contributes around 5g, and trans fat sits at 0g throughout. Cholesterol lands between 65mg and 95mg per slice, while sodium ranges from 115mg up to 200mg or 180mg depending on how much raising agent and salt the batch includes. On the lighter side, dietary fibre and fiber both come in at 2g, which the cherries and coconut quietly contribute to without you really noticing.
The Ingredients That Actually Make the Difference
After baking this cake more times than I’d care to admit, the single biggest lesson I’ve taken away is that high quality ingredients are never wasted here. Starting with the cherries they must be well drained before going anywhere near the batter. Any excess moisture left on them will sink straight into the mix and throw off the texture entirely. I always pat them dry and give them a light dusting of flour to help them stay suspended evenly throughout the bake. For the coconut, fine desiccated coconut is the right call because it blends smoothly into the mixture and creates a far more even crumb than the coarser variety, which can make the sponge feel uneven and slightly gritty in patches.
The rest of the ingredients deserve just as much attention. Fresh eggs make a genuine difference to how well the batter holds together and how consistent the rise turns out — older eggs simply don’t perform the same way. Real butter adds a depth of richness and flavor that no substitute quite replicates, and it also helps the cake hold its shape once cooled. The bright colour of quality glacé cherries running through each slice is part of what makes this bake so visually appealing too. When everything is chosen carefully and measured properly, the result is a soft, balanced crumb that tastes exactly the way a classic Mary Berry recipe should simple ingredients doing exactly what they’re meant to do.
Simple Swaps That Still Deliver a Great Result
One swap I genuinely stand behind is replacing a portion of the butter with Greek yogurt. It sounds like an unusual move, but it works remarkably well the yogurt brings moisture into the batter without loading up on fat, which naturally produces a lighter crumb without straying too far from the classic feel of the original. I’ve done this in batches where I was cutting back on richness, and the difference in weight and softness was noticeable in a good way. The texture holds together just as well, and the slight tang from the yogurt actually plays nicely against the sweetness of the cherries, adding a quiet layer of depth that you wouldn’t necessarily expect from such a simple substitution.
On the flour and sugar side, there’s room to adjust without losing what makes this cake worth baking. Swapping in whole wheat flour for part of the plain flour introduces a little extra fiber and a mild nuttiness, though going too heavy with it will make things noticeably dense so keeping it to around a third of the total flour is the sensible limit in my experience. Cutting back slightly on sugar works too, especially since the cherries already carry plenty of natural flavor and sweetness on their own. These small, thoughtful changes let you keep the soul of the recipe intact while nudging the taste and nutritional balance in a direction that suits you better without compromising the overall result.
How to Bake It Right, One Step at a Time
Before anything else, preheat your oven and get your lined tin ready this is one of those steps that’s easy to forget in the excitement of getting started, but skipping it means your batter goes in cold and the rise suffers for it. From there, cream together the butter and sugar until the mixture looks genuinely pale and smooth; this takes a couple of minutes longer than most people expect, but that extra air is what keeps the finished cake light. Add the eggs one at a time, mixing well between each addition to stop the batter from splitting. I’ve rushed this part before and paid for it with a curdled mix that never quite recovered its structure, so patience here is genuinely worth it.
Once the base is well combined, gently fold in the flour and coconut together, turning the mixture slowly so you don’t knock out the air you’ve worked to build up during creaming. The batter at this stage should feel thick but still drop easily from the spoon — if it’s too stiff, something has gone slightly off in the earlier steps. Now comes the part that makes this cake what it is: scatter the cherries through and fold them in just enough to distribute them evenly without breaking them up. Pour into your prepared tin, smooth the top, and get it straight into baking. Keep a close eye towards the end and pull it out once the surface turns a proper golden colour and a skewer comes out clean.
How Each Ingredient Earns Its Place in This Bake
What makes this cake work so well is how thoughtfully every ingredient pulls its weight. The cherries bring natural sweetness and a gentle hit of moisture to each slice but only when they’re properly well drained beforehand. Leaving any excess moisture on them is the most common mistake I see, and it throws off the entire consistency of the batter. Once dried and lightly floured, they distribute evenly through the sponge and deliver that characteristic burst of flavour in every bite. Alongside them, desiccated coconut adds a gentle chewiness and a subtle tropical note that lifts the overall texture without overpowering the other flavours at work.
The remaining ingredients handle the backbone of the bake with quiet reliability. Butter brings richness and keeps the crumb soft in a way that cheaper fats simply don’t replicate something I noticed clearly the one time I tried substituting it out of convenience. Eggs tie everything together and give the cake its structure, ensuring that each slice holds its shape cleanly when cut rather than crumbling apart. Flour does the steadying work underneath all of it, providing the consistency and body the batter needs to bake evenly from edge to centre. When these core ingredients are treated with care and measured properly, the balance of flavour and texture in the finished cake genuinely speaks for itself.
Why This Cake Has Never Gone Out of Style
There are very few recipes that manage to stay genuinely popular across generations without feeling dated, and this cake is one of them. Its timeless appeal comes down to something quite simple it delivers a soft, light texture and a balanced flavor every single time, without demanding anything complicated from the person baking it. The combination of cherries and coconut hits a particular sweet spot that never feels heavy or overdone, and the consistency of the result is what keeps people coming back to it. Whether it’s a birthday, an afternoon tea, or just a quiet weekend at home, this is the kind of cake that suits almost any occasion without needing to be dressed up or explained.
What I find most reassuring about this recipe is how equally well it works for beginners and experienced bakers alike. There’s no tricky technique hiding inside it, no temperamental component that requires years of practice to get right just reliable steps that produce a genuinely satisfying dessert every time they’re followed carefully. The rich depth of the cherries against the coconut creates a taste that feels far more considered than the short ingredient list might suggest. That contrast — simple to make, yet complex enough to impress is exactly what has kept this recipe a firm classic favourite in British baking for as long as most people can remember.
Mary Berry Cherry and Coconut Cake Recipe (FAQ’s)
Can I bake this cake in advance?
Absolutely in fact, baking it a day ahead often works in your favour. The flavour deepens overnight and the crumb settles into a noticeably soft, even texture by the next day. Simply store it in an airtight container once fully cooled and it stays perfectly fresh for several days without any fuss.
What type of tin should I use?
A deep round tin measuring 8 inch or 20cm is the most reliable choice for even baking throughout. A square tin of a similar size can work too, though the corners tend to bake slightly faster than the centre, so keep a close eye towards the end of the baking time.
Can I freeze this cake?
Yes wrap it tightly and it will freeze well for up to three months or 3 months with no real loss in quality. When you’re ready to eat, simply thaw it at room temperature for a few hours before serving, or leave it overnight in the fridge if you prefer a slower, gentler defrost.
Are glacé cherries essential or can I swap them out?
Glacé cherries are genuinely essential to this recipe they carry the sweet, signature character that defines the bake. Sweetened coconut can occasionally replace desiccated coconut if that’s what you have, but be mindful that it adds extra sugar and can tip the sweetness too far if you’re not careful.
Why did my cake turn out dense or soggy?
A dense or soggy result usually points to one of two things either the glacé cherries weren’t properly drained before going into the batter, or the ingredients weren’t measured carefully enough. Always weigh everything precisely rather than estimating, as even small imbalances in flour or fat can affect the structure significantly.
Why does my cake come out crumbly or dry?
Crumbly texture and dryness are almost always caused by over-baking or too much flour in the mix. This recipe needs roughly 45–55 minutes in the oven, so start checking at the lower end of that window. Allow it to cool in the tin for at least 10 minutes before turning out, as cutting into it too soon can also make it appear drier than it actually is.
A Bake That Delivers Every Single Time
This cake sits in that rare category of dessert that genuinely asks very little of you while giving back a great deal. The ingredients are straightforward, the techniques are manageable for almost anyone, and the whole process comes together with minimal effort once you understand the rhythm of the recipe. What strikes me most, having made this more times than I can count, is how consistent the result is not just occasionally, but reliably, every single time. That kind of dependability is what separates a truly well-constructed recipe from one that only works when everything happens to go right.
Whether you’re fitting it into the quiet routine of everyday baking or pulling it out for special occasions where you want something that looks and tastes considered, this cake earns its place either way. It’s simple without being boring, soft without being fragile, and flavorful in a way that feels natural rather than forced. The cherry and coconut combination does exactly what it should producing a satisfying bake that people remember and ask about long after the last slice is gone. For a recipe with this little fuss involved, that kind of lasting impression is really something.
Related Post
Mary berry chocolate chip- banana bread recipe